Quantcast
Channel: NerfHaven - Mods
Viewing all 627 articles
Browse latest View live

AtchAttachments Retaliator Slam-Fire Kit+Worker Prophecy?

$
0
0

Quick question, since the Worker Prophecy is essentially a third-party Retaliator shell that can come with various external components, would it be compatible with the AtchAttachments Slam-Fire Retaliator kit? (  if you are not aware of the kit in question).

Theoretically, if the Worker Prophecy is compatible in its maxed-out form (expanded plunger tube, Stefan breech, Scar barrel ,K-25 spring, Worker stefan mags/Katana mags), we could have a relatively accurate, 180-200FPS, high-ROF replacement to high-modded EAT's, which would effectively dominate most other springers.


Of course, note "Theoretically". Has anyone tried putting a Retaliator slam-fire kit in a top-tier Worker Prophecy? If you have, what's your experience with it?


Rayven "Flip Clip" Extended Battery-Tray Cover

$
0
0

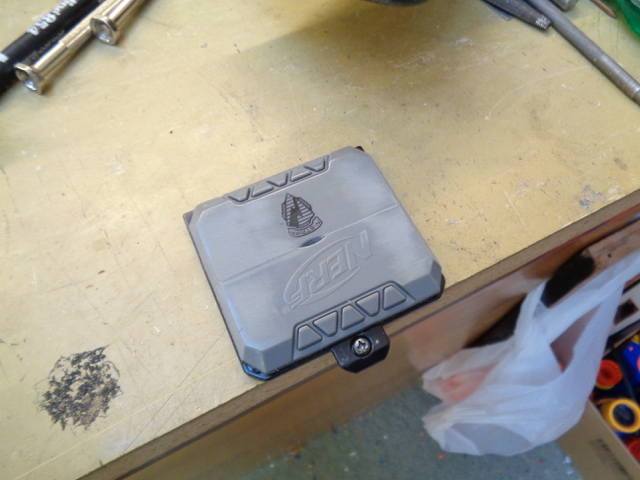
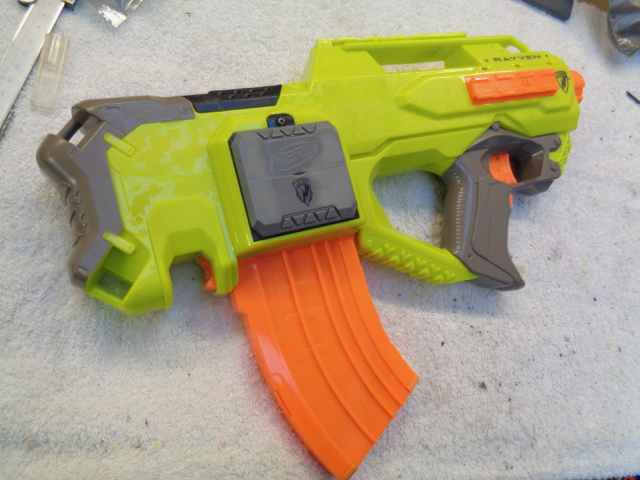
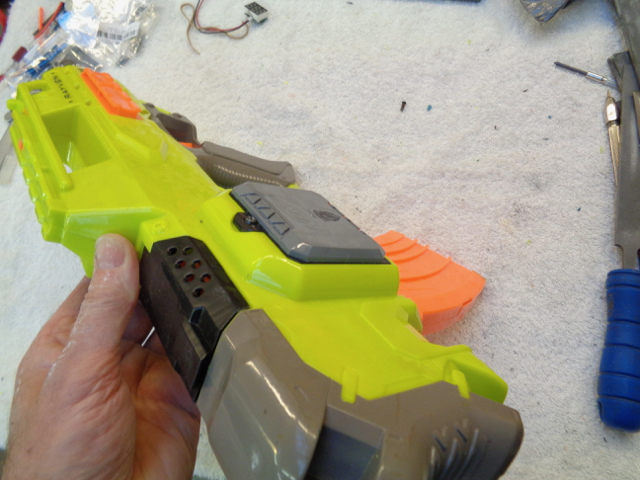
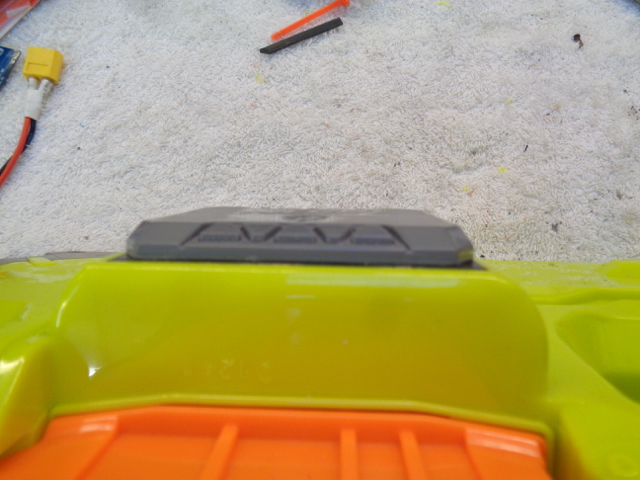
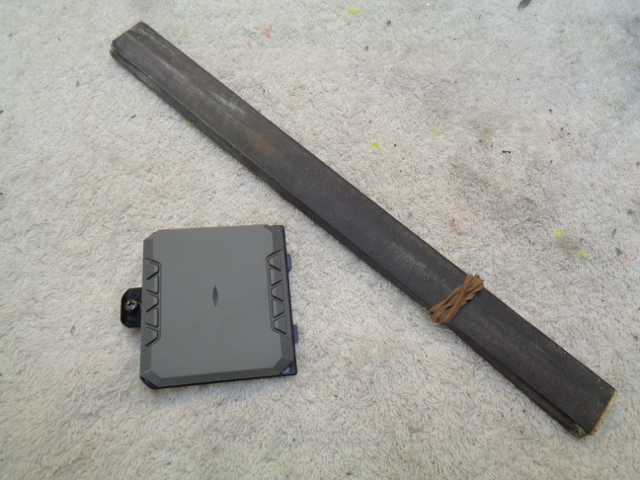
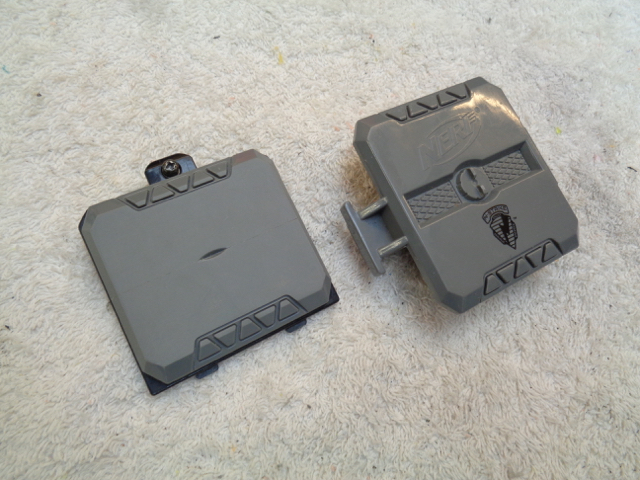
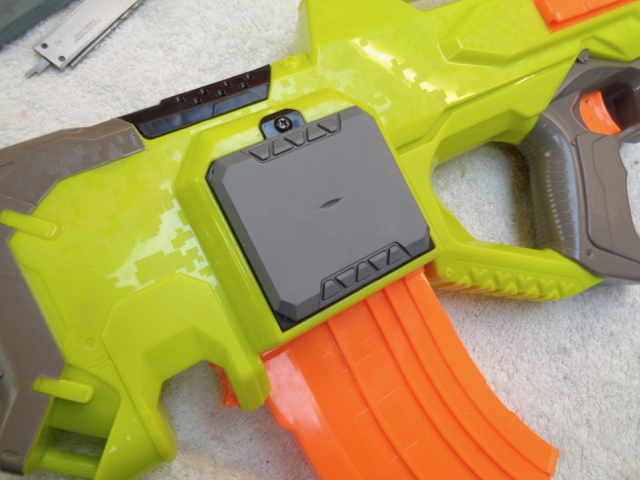
For those that missed it on Reddit, here's my attempt at an extended battery-tray cover for the Rayven using an N-Strike Flip Clip. Apologies if someone's done it all before!


View Imgur gallery here: https://imgur.com/gallery/evkvX#f8ZUQvu


DSC03599.jpg


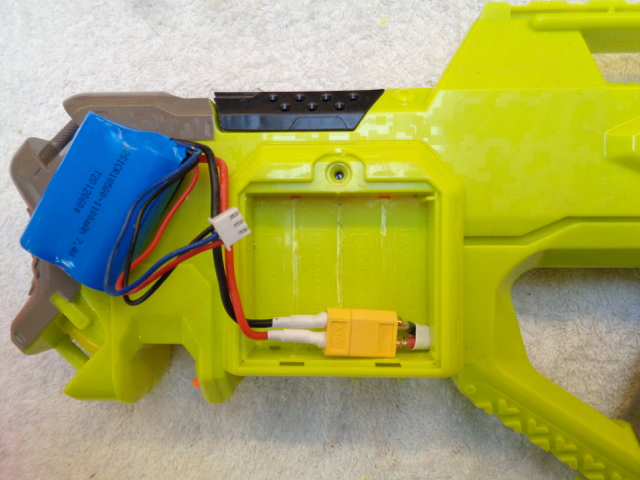
The little 2S Lipo that I'm using was in a prior life powering 2 x FK180-3539's in an RC helicopter so should be rated to their continuous current demands. Short-term they've powered the Rapnadomolisher on full-auto... I'm just not so sure how they'd deal long-term with full stall current (approx. 15 amp each) so I'm limiting their use to lower-spec'd semi-auto builds. Here it's just powering stock motors, wheels and cage for family-friendly "Stock+" games. Rayven's mag-alignment and trigger pull sorted, 16AWG rewire and 16 Amp microswitch, volt-meter and kill-switch added plus a XT60 connector for swapping in a different cage - so it can be taken back up to super-stock when needed.
 

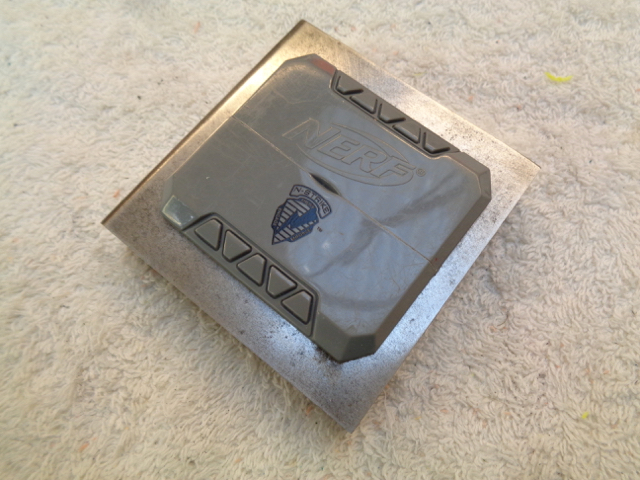
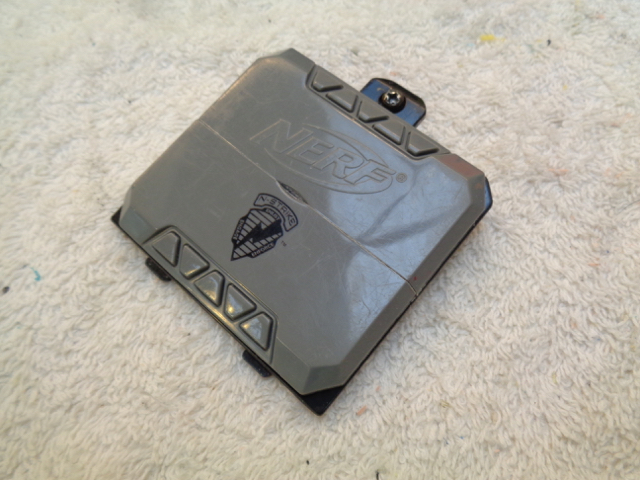
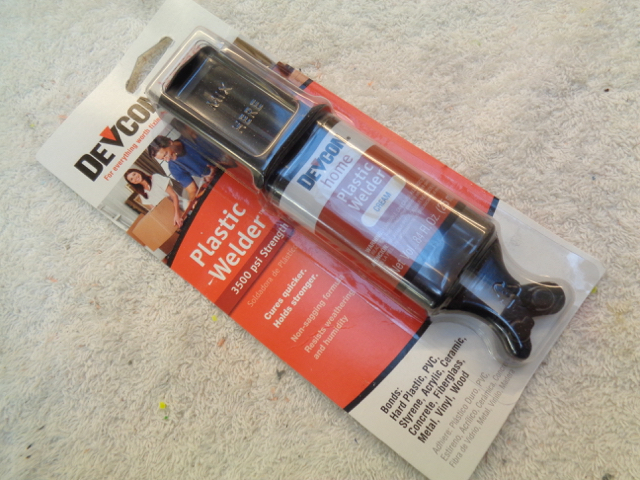
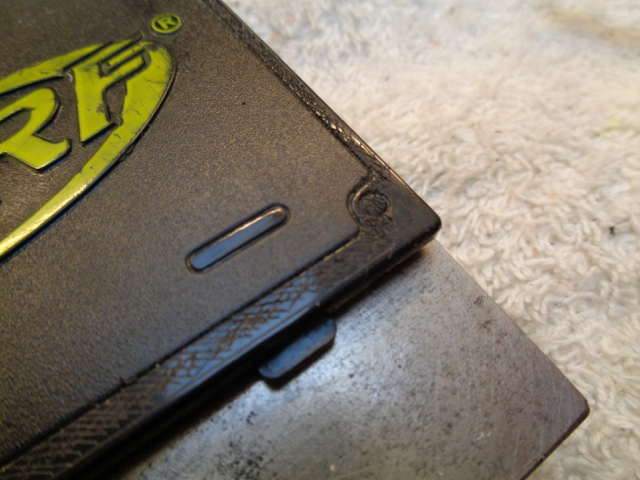
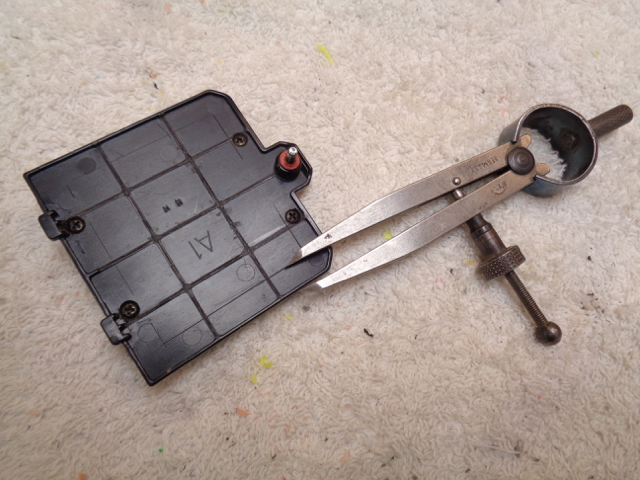
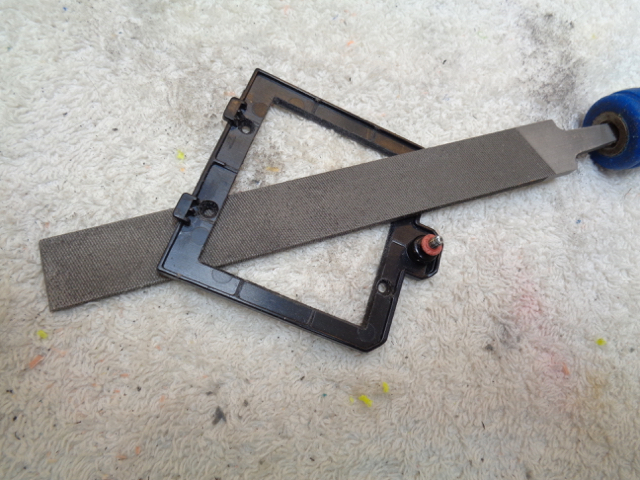
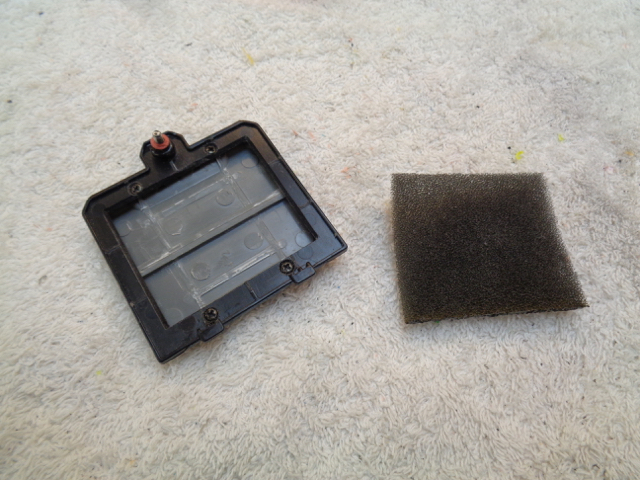
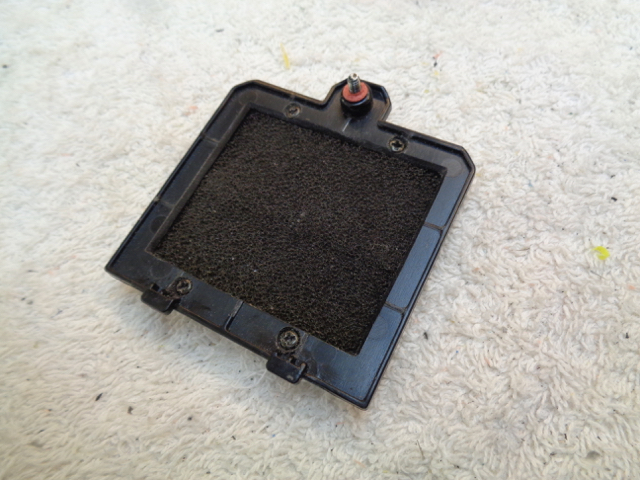
The Devcon ended up not taking onto the original black plastic cover so I resorted to small screws (recovered from the stripped RC chopper). If you look very closely in image #30 you can just see where the screws are finding purchase in the Flip Clip (into the outer trianglular depressions) without having to drill through the plastic entirely.

Note: the same completed extension will also fit exactly onto a Demolisher battery-tray cover (and adhere better because ABS).


1. T-Series T-11 RC Helicopter - Stripped for parts

1. T-Series T-11 RC Helicopter - Parts.jpg


2. T-11's 18500 2S battery pack in Rayven

2. T-11's 18500 2S battery pack in Rayven.jpg


3. Battery tray cleared and wired for XT60

3. Battery tray cleared.jpg


4. Battery tray cover won't close

4. Battery tray cover won't close though....jpg


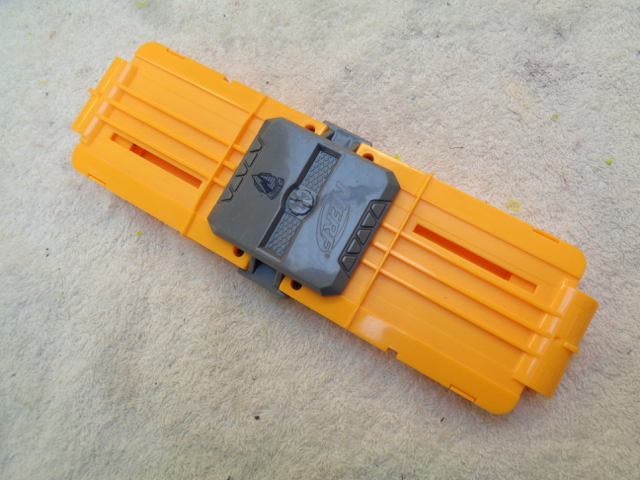
5. Enter the N-Strike Flip Clip

5. Enter the N-Strike Flip Clip.jpg


6. N-Strike Flip Clip (rear). There's a screw cover you need to pop off then you can unscrew and separate the halves.

6. N-Strike Flip Clip (rear).jpg


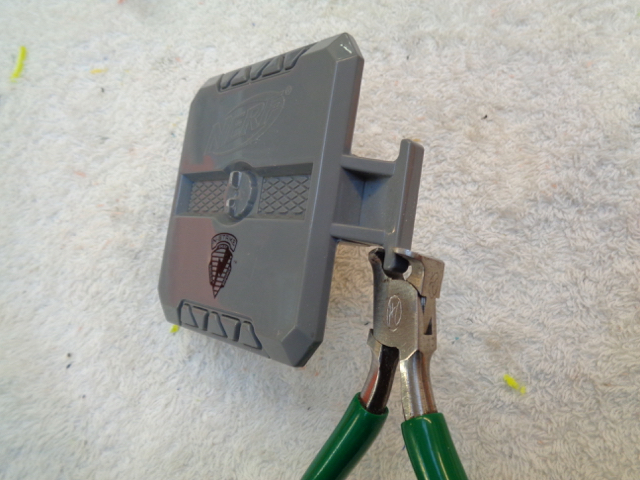
7. Trim flanges to fit into vice

7. Trim flanges to fit into vice.jpg


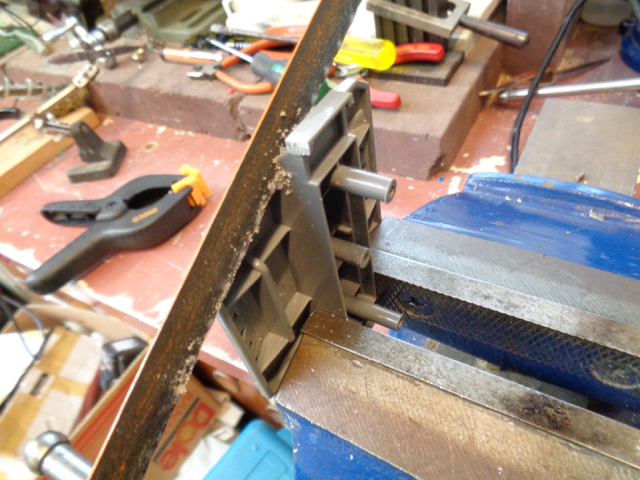
8. Hacksaw while in vice

8. Hacksaw while in vice.jpg


9. Saw off all rear webs and bosses

9. Saw off all rear webs and bosses.jpg


10. Jeweller's Saw to remove middle

10. Jeweller's Saw to remove middle.jpg


11. Sawn

11. Sawn.jpg


12. File up to these centre webs

12. File up to these centre webs.jpg


13. Using a flat block to square edge

13. Using a flat block to square edge.jpg


14. Join is flush and even on block

14. Join is flush and even on block.jpg


15. Sits nicely on Rayven's battery cover

15. Sits nicely on Rayven's battery cover..jpg


16. Devcon cherry busted...

16. Devcon cherry busted....jpg


17. Mixing up with black concrete-colouring

17. Mixing up with black concrete-colouring.jpg


18. Texturing join for better adhesion

18. Texturing join for better adhesion.jpg


19. Lying flat on table edge

19. Lying flat on table edge.jpg


20. Clamping flat

20. Clamping flat.jpg


21. Peeling off excess glue while tacky

21. Peeling off excess glue while tacky.jpg


22. Devcon didn't bond (D'oh!) so went with small screws also recovered from the RC chopper (see image 30)

22. Devcon didn't bond, so went with screws.jpg


23. Trying on Rayven shell

23. Trying on Rayven.jpg


24. Looking good

24. Looking good.jpg


25. Decent height giving good depth extension. Nice bevel detail.

25. Decent height nice bevel.jpg


26. Scribing cutout lines parallel to edge

26. Scribing for cutout lines parallel to edge.jpg


27. Drill corners, then jeweller's saw

27. Drill corners, then jeweller's saw.jpg


28. Checking battery for fit

28. Checking battery for fit.jpg


29. Square and bevel edges

29. Square and bevel edges.jpg


30. Snip off excess web material. If you look very closely here you can just see where the screws are finding purchase in the Flip Clip (into the outer triangular depressions) without having to drill through the plastic entirely.

30. Snip off excess web material.jpg


31. Thin foam to stop rattling

31. Thin foam to stop rattling.jpg


32. Tuck under edges

32. Tuck under edges.jpg


33. Inside done

33. Inside done.jpg


34. Sand off logos with 180-grit. Ideally, to completely flatten large areas like this you'd go face-down onto a full sheet of Wet and Dry on something DEAD flat like a ~10mm thick plate of glass. A nice tightly-wrapped sanding stick does the job fine though.

34. Sand off logos with 180-grit.jpg


35. Finish with 600 grit Wet and Dry

35. Finish with 600 grit Wet and Dry.jpg


36. Finished item fitted to Rayven

36. Finished item fitted to Rayven.jpg

Different Wiring For Two Stage+ Flywheel Builds

$
0
0

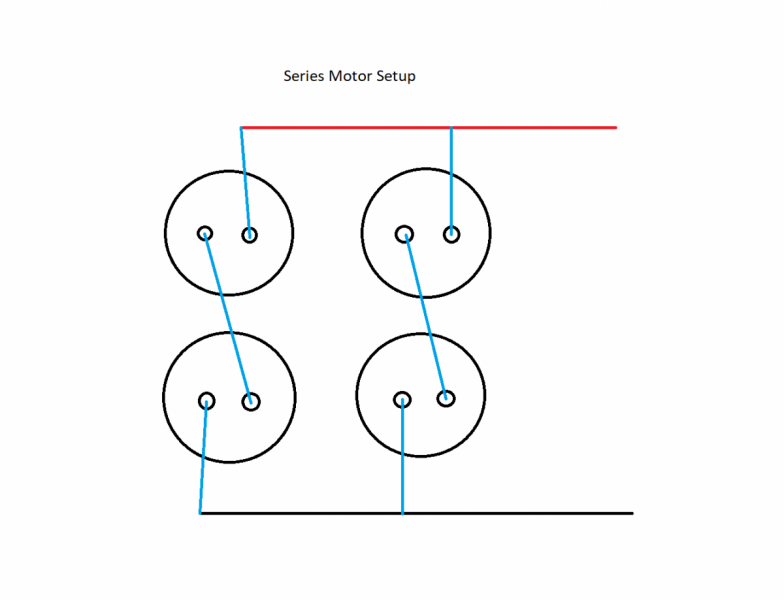
So I was in English Class today thinking about Nerf mods as usual when I came across an interesting solution I have been having with two stage flywheel builds. In a typical single stage build the motors are wired in parallel so that the entire voltage of the battery drops across each motor causing them to spin at their max rpm for the given voltage of the battery. However this means that the maximum current drawn by the motors in this setup is the sum of their stall currents. In a single stage setup this will top out at ~50A for the thirstiest motors and shouldn't be that much of a problem for a typical 3s battery. However in a two stage or more build with 4+ motors being used, this current draw could be over 100A! Not only is this much more than many 3s batteries are rated for, but it is incredibly dangerous. However, by rethinking the motor wiring, I think this issue can be solved. By wiring each set of motors in series and them those sets in parallel, the amount of current drawn is halved. On the flip side, double of the amount of voltage is required to spin the motors to the same RPM. I have been doing some searching and found this 6s battery which I think should be able to accomplish the job and isn't too much more expensive than a 3s. I have some diagrams below showing the difference in wiring. I'd like to know what you guys think since I'm only 85% positive on my physics. 

paralell 2 stage.png

series 2 stage.png

End-war modifications

$
0
0

I am wondering what mods would be best to do to my elite raven i have removed all the locks and i plan on doing more but i would like to have a list of mods and where to get the supplies for them also i need a way to get cheap nerf darts too. also i need to know how to remove the priming bar for the zombie strike longshot too

Fixing Bad Paint Prep

$
0
0

So yeah, I dun goofed.  I got some bad advice and thought I only needed 120grit sanding before painting with a rustoleum 2x paint/primer in one.  Two coats in, and I can still see the scratches. I've found guides here/google on how to remove all paint for a new paint job, but this is a black base/primer coat so I'm hoping there's flexibility.


What's my best option for correcting?  Can I just re-sand the crap parts with ~200/300/400 or do I need to completely strip and try again?  Does it need to be sanded by hand, or can I use a dremel to start?


Thanks.

Weirdest mechanical failures you've ever had?

$
0
0

Modders tend to have some weird reliability issues with their projects since we're taking the blasters we're modding and turning them up to 11. However, what is the absolute weirdest mechanical problem you've ever experienced?

In my case, I just had my Rapidpistol fail when the pusher bumped the lip of a magazine. I cracked the epoxy on the ass end and looked at the problem. Apparently the section of the pusher mechanism that holds the 130 motor broke, so now, when the pusher gets too much force against it, the motor flies in the opposite direction of the gears that move the pusher and send it slamming out of alignment with the shell, making the pusher stop working.

Detailing Paint

$
0
0

I wish to ask you guys about what paints you guys use to personalize your blasters:
-Do you guys have a preferred brand for primer?

-Is vinyl dye from one brand compatible with a base enamel of a different brand?

-What do you guys use for detailing paint?


I know Citadel paint is very good and very trusted, but it's rather expensive in my opinion and the nearest vendor is a 3 hour drive from where I live. I'm wondering if there is any other brands people have.


Thanks in advance for your guys' input.

Is it possible to run 4 IMR’s in series / parallel to get the power an

$
0
0
I have a newly bought Nerf Stryfe. Seemed to be the one to get to modify and have a little fun with. Anyway Ive seen a lot about running 2 or 3 IMRs with dummies. I guess getting around 7.4 or 11.1 volts running in series? I think maybe it was parallel? (Im def not an electrician by any means) But only around 700mah depending on the type and brand. Which I see a lot of other posts saying isnt enough. How about running 4 in series and parallel? It would only be aboutt 7.4volts but would double the MAH to 1400? This is all approximated on 14500 IMRs I ordered by EFest rated at 700mah. I trust EFest and use them in ecigs. I just think it would be nice that even no door mod needed and a nice full factory tray obviously rewired would look nice. Ive looked around a bunch of forums and not found anything about doing this specifically. Is it possible? And if so could someone maybe post a wire diagram for it? Forums are great I have learned so much but am new to being a poster. Please excuse me if I have done anything out of line or not in the right order but Id really like to see if this is possible. And run with it. Can anyone help?

Verdict on the Worker aluminium FWC kit?

$
0
0

http://www.lightake.com/p/Worker-Modified-Parts-Set-for-Nerf-Toy-Gun-STF-CS-18-Diamond-Pattern-Orange-Blue_2257156.html?sku=2257156Just so we're aware of what we're talking about, this kit here, motors, wiring, cage, flywheels and all.


I looked on YouTube for reviews but all I got was fitting guides (which I don't need). What I was looking for was data on how well this setup preforms on average. Do you lose out on FPS that you would have gotten with normal flywheels and a normal cage on similar motors? Or is this particular kit worth it?

I'm asking because I intend to make an LMG Vulcan and use the Vulcan like a Rapidstrike pusher for belts and the main "beating heart" of this Vulcan (IE the source of all its actual power) is going to be this setup on 22.2V using 6x 14500 Trustfires and 2x dummy batteries.

Which 132 3s should I use?

$
0
0
Im doing a build and I want 3s 132 motors, I was originally going to get fangs but then I saw the Titan hyperion-X motors (red ones) and was wondering which one would be better,maybe w/ hooligan wheels and a morphwus cage. Also what would be a good 3s that fits in a stryfe w/ a BSUK 20mm tray expander.
-Thanks

Different modified blaster firing sounds

$
0
0
Hey all

I was tinkering with a new Longshot mod the other day (basic A.R removal, 10kg spring, rubber padding, etc) and noticed the odd variances that the blaster made when fired. Sometimes it would be a short crashing sound, and other times it would be a low thud with a long vibration afterwards. So, I was wondering what is a normal noise for a modified blaster with its plunger padded (rubber washer) and somewhat heavy spring (10kg) would make, or is it just random? Anyways, I'm curious since I'm wondering if the short crashing noise is caused when the dart has a looser fit in the breech so the plunger can move forwards quicker with less resistance, and the low thud with long vibrations happens when the dart is tighter in th breech. Also, I'm a little worried if my plunger tube assembly (which is stock) is suffering damage (polycarbonate plunger head and plunger rod though).

Thanks!
Have a happy New Year

Nerf Maverick help: catch issue?

$
0
0
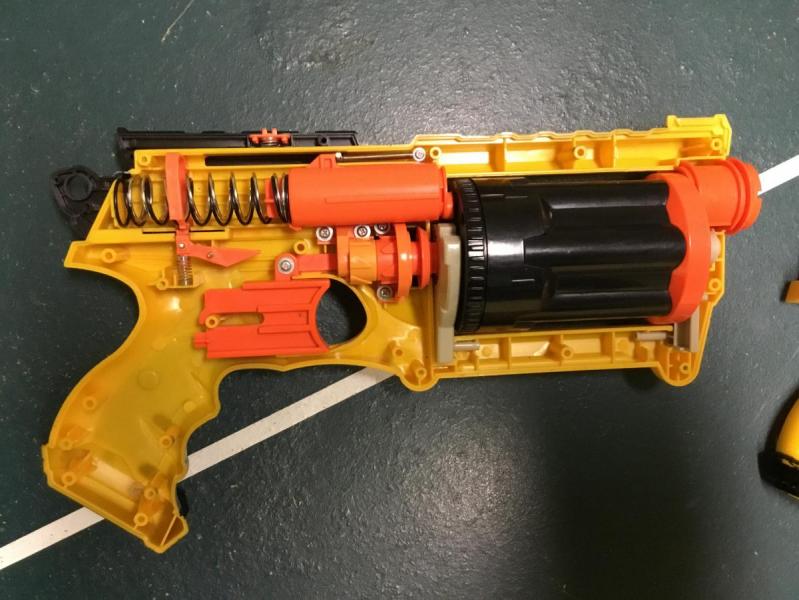
I tried upgrading a Maverick by combining an old Spectre spring with the stock one, but when I try to fire it it doesn't catch. Ive tried replacing the stock catch spring with a pen spring, but it hasnt done anything.

Attached is a picture of the internals. Whats wrong with it, and what should I do?

Thanks in advance.

Edit: fixed some grammar

Attached Thumbnails

  • 83570E1A-01CA-4B4F-A308-EC9DF06E7A66.jpeg

Will 10amp micro switches work in a Meishel 2.0 Hyperfire Build?

$
0
0

I've finally got around to building my Hyperfire, and I'm having trouble fitting in two 16 amp switches, so I'm considering just using two of my old 10 amp switches. Will this work, or should I be safe, and try to fit the 16 amp switches in.


I'm using two Meishel 2.0 motors, and the stock pusher motor with an OFP cage, and probably this Lipo. https://www.etsy.com/listing/579949505/turnigy-2s-2200mah-25c-lipo-pack-xt-60?ref=shop_home_active_8


While I'm asking for advice should I hunt around for a battery with a higher C?


If anyone has any suggestions, or advice It will be appreciated, Thanks!

Longshot Sleeper Breech build questions

$
0
0
So I was thinking of ways to improve my Longshot, and decided that I'd like to build a sleeper breech one day (probably during the summer). I only want around 100 fps, so I was wondering if it was possible to use a 5kg spring with roughly 6 inches of 17/32 brass as the barrel.

Thanks

20v Power Tool Battery Blaster Adapter

$
0
0

Project Overview:


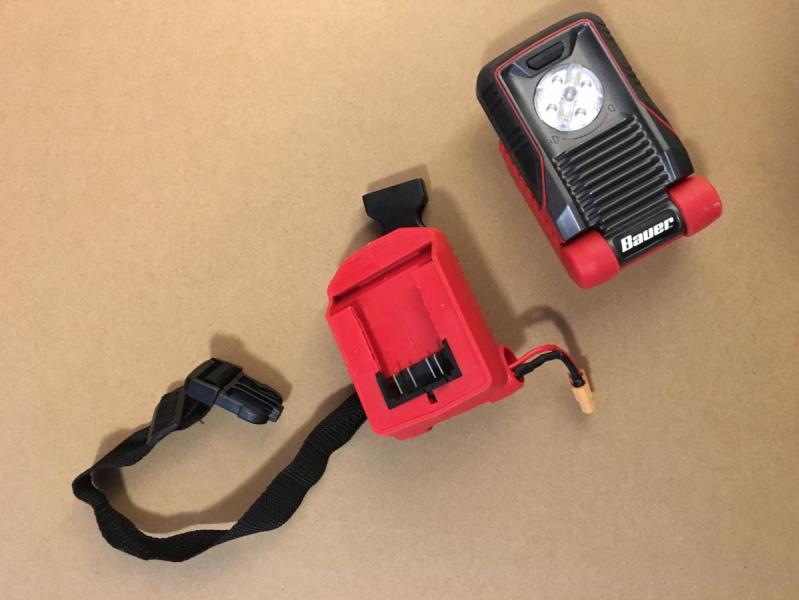
This is a partial writeup on how I made use of a 20v Lion power tool pack as a ~3s rigged flywheel battery pack with an adapter. You can pretty easily adapt the process to any power tool brand/capacity, so I'm not going into specifics. If you don't know what you're doing with the power tools/systems involved, don't try it without asking someone who does for help.


INTRO & BACKGROUND:


I'm showing it on my 3s Strayvan, though because I wired it into an XT60 I can plug it into any other blaster I build in the future, or any other blaster using an XT60 running ~3s. It has also worked on my 12v/stock rayvan cage mk 13 prototype.


I know a good number of people don't like using Lipo because of the perceived danger involved in using the cells. I don't blame anyone for doing that; I don't actually keep the one large lipo I own in my house. My buddy keeps it for me, along with the charger. This arrangement worked fine to war with, but as I am always tinkering, it didn't last long: I couldn't keep asking him to charge the lipo so I could experiment with the mk 13 (current primary project). And I didn't really want to get into a charger system just for the one battery. So I began researching whether using power tool packs was, in fact, a good idea. It seemed to be, so here we are!


Process:


Time required: ~1-2 hours

Tools:

Soldiering Iron, 3rd hand

Wire snippers/strippers

Drivers as required by your tool system

Knife


Materials:

Sacrificial cordless power-tool

14-16ga stranded wire; I use primary wire

Heat-shrink

Battery connector of your choice (here, XT60)


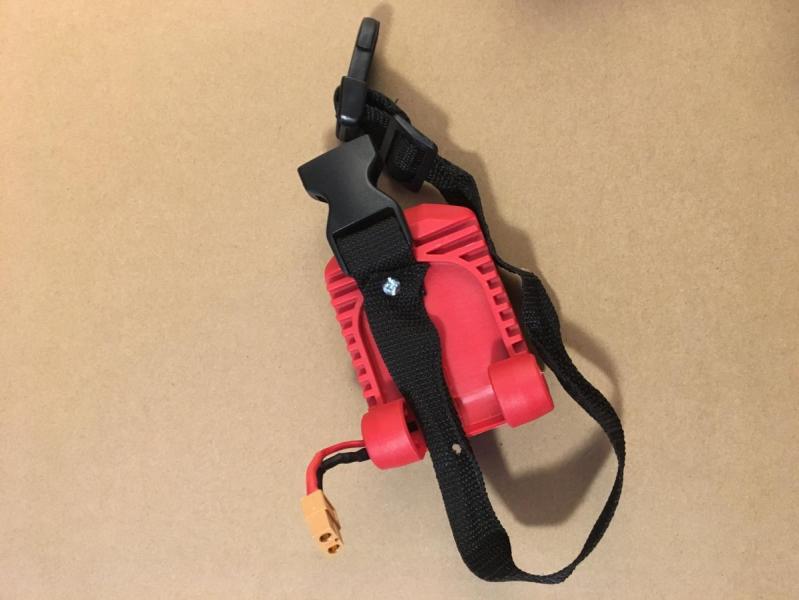
Optionally, webbing and buckles and screws. These were scrounged from backpacks and stuff I had lying around.


Here it is:


IMG_5528.jpg


IMG_5530.jpg


I used a Harbor Freight Bauer LED worklight. It cost me $10 or so, sometimes it'll be on sale for less but not as often as other no-brand Harbor Freight stuff (20% coupons don't work). To go with it, I had previously picked up a Bauer Driver Combo pack (Drill, 1.5 Ah battery, charger) on sale for $65 or so. A spare worklight is adjacent to the modified light.


To do the conversion, I opened the light up, removed the unnessecary light parts, and rewired the plug with my heavier-duty wire (being a light, the wire was pretty thin before). I also had to connect both pins of the positive and negative sides, as they weren't connected in the light (but were in other tools, I'm pretty sure I checked).


Then I just ran the wire out and attached the XT60. Screwed in the webbing and I was all set.


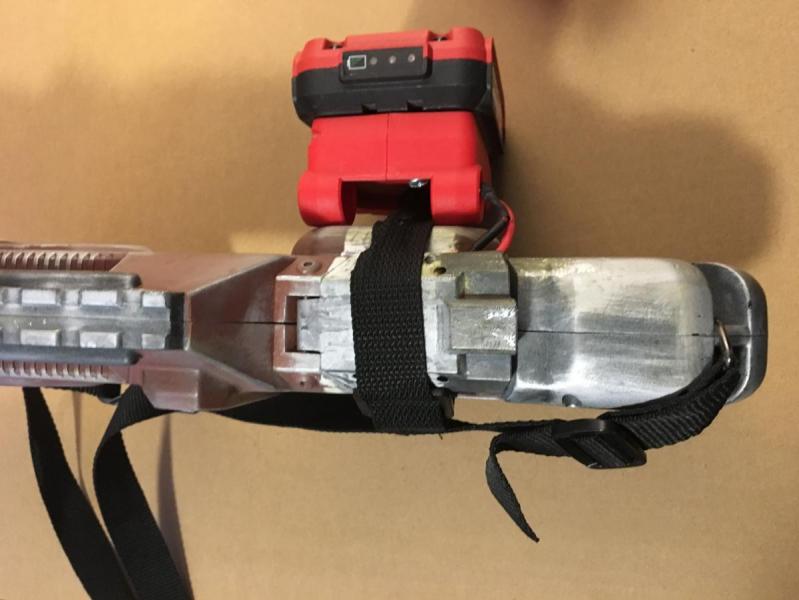
Here it is with a battery:


IMG_5531.jpg


These batteries are nice: hard shell, built-in charge indicator, if one is bad you can just walk it back to HF and they'll replace it no questions within their usual return window. The charger plugs into a wall outlet and has indicators to tell you if the pack is bad or not, if it's too hot/cold, and if it's charged/charging. Charge time for me is only a couple hours.


Here it is on my Strayvan, as you can see a little bulkier than if I'd integrated it, way more than if I'd used a pack inside (but who cares?):


IMG_5532.jpg


I didn't integrate it because I'd realized that $10 a pop is way more than $1 a pop for the XT60. This also caused me to realize it might be possible to wire up a split pigtail to several blasters on my person and keep the pack on my belt - not that it wouldn't also be possible with a Lipo, given a hard-shell belt pack.


Questions, comments, and criticism welcome as always.


White-and-Pink Black Box: Flipside Bow

$
0
0

I found an unwanted Rebelle Flipside a little while ago. I never planned on getting one, but someone was just throwing it away and I was curious. It seems to work well enough. Pull back the string to prime, let it go to shoot, mash the trigger to flip to a fresh cylinder.


Of course I wonder how we can improve it, so I start looking it up and immediately hit a problem: there doesn’t seem to be much about modding the Flipside. I can’t even find a shot of the internals. I’d probably be able to wing it, but I’d rather not. It’s a perfectly good blaster and I’d rather not mess it up.


Does anyone else have any experience with this goofy thing?

Full Auto Rayven Build Guide

$
0
0

IMG-0165.JPG


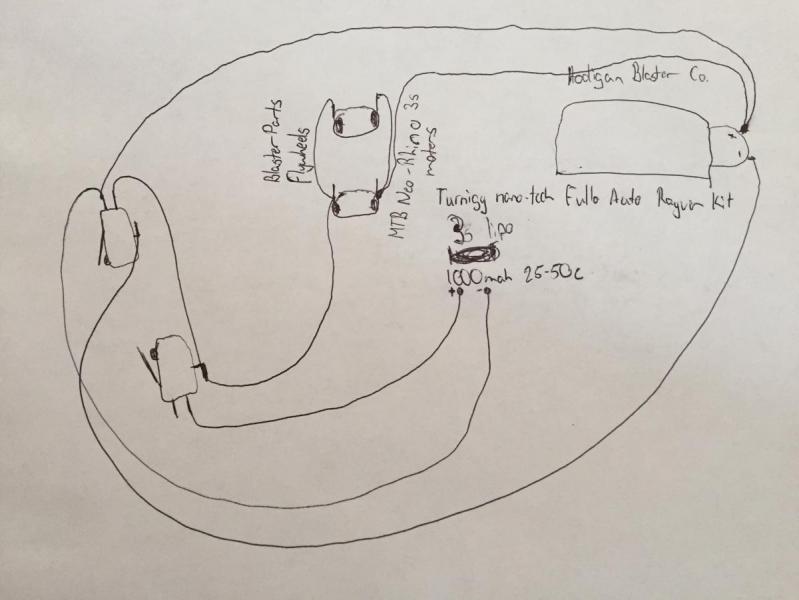
Just finished putting this one together. I was tooling around for something interesting to do and decided to hype up a Rayven with a a new paint job, high-torque motors, and full-auto kit. The most challenging build about this work was the pusher. The original spring rod in a stock Rayven does not attach to the 3-D printed piece so I stripped a Spectre of its slide return tension spring and that seems to be doing the trick.


Materials:


1X Nerf Rayven or Rayvenfire

2 X MTB Neo-Rhino 3s motors

1 X Nerf Rayven Full Auto Conversion Kit (see link below)

1 X set of flywheels (I chose Blasterparts, but any aftermarket set should work)

1 X tension spring

1 X 3s lipo pack (Turnigy nano-tech 1000 mah 25-50c)

1 X male XT-60 connector

2 X 15A Microswitch

16 or 18 AWG silicone wire

Solder


Tools:


Soldering iron

3rd hand

Hot glue gun

Dremel with grinding and cutting bits

Philips screwdriver

Needle-nose pliers


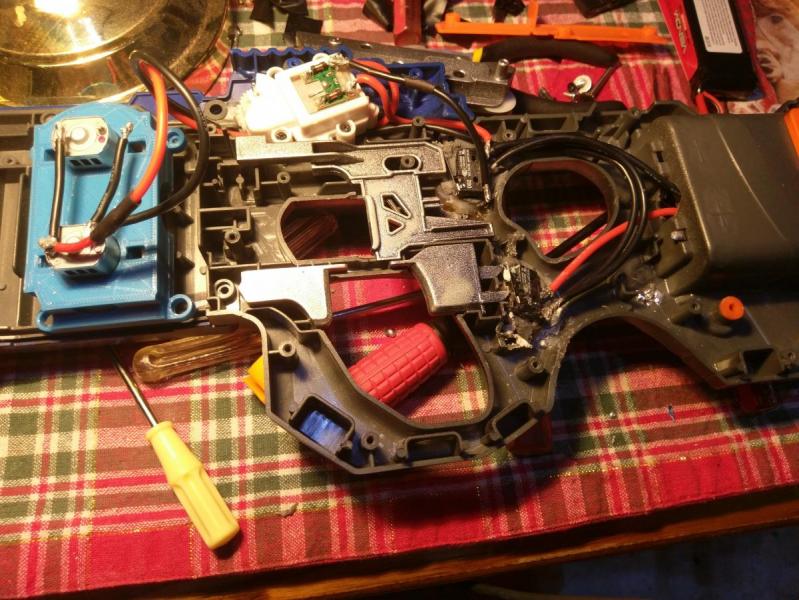
The assembly is relatively straight forward. I highly recommend removing the plastic post just below the handle. This little post makes it very difficult to butterfly the blaster and does not really serve any purpose. I did not have to do very much dremeling to get the microswitchs into place and they are held on with hot glue. I tried a new mounting technique where I put a band of hot glue over the top of the switch and connected it top and bottom to really hold it in place. 


I dremeled little holes in the flywheel cage to mount the motors with screws. This step is not required but it does help minimize vibration. The new Neo-Rhino motors work phenomenally and combined with the Blasterparts flywheels provide a really fast spin-up time. 


The full auto kit was not too difficult to mount. I highly suggest cutting off the second motor rod that sticks out the back; it does not fit well inside the frame. 


The second most difficult part about this build was getting the lipo to fit. I used a nano-tech 3s 1000mah, you can use anything up to that size, I can't imagine anything larger would fit without a larger battery door. As you can see in the picture, the pack is very snugly placed inside the original battery tray. I dremeled out the two sides from the bottom of the tray all the way to the edge where the door comes down. For the door all I had to do was grind down the excess plastic to make it a flat surface and now it fits over the pack with very little discernible bend from the outside.


IMG-0167.JPG


Because the new pusher for the kit is a little bit bigger, I had to trim some of the shell. This does not kill the aesthetics as it is all covered when the jam door is closed. Also, make sure to pick the right axis with the gear box. If the pinion spins the wrong way, flip the gear box and move the pinion. 


Thank you everybody for reading. This is my first forum post and I appreciate any feedback you can give me. 


Nerf on and God Bless!

David


Purchase Link:

https://www.hooliganblasterco.com/rayven-gear/718rannx97atur78emzswkt1amtid1


Attached Thumbnails

  • IMG-0175.jpg

longshot minimization w/ retaliator integration

$
0
0

i just recently took apart my dead retaliator and added its spring to my longshot then i got the idea huh can i minimize the lonshot then put in the dart thing from the retaliator into the longshot to eliminate the problem of the chambering of elite darts is that possible or am i being stupid. the image is of the retaliator barrel attachment spot because it has the "lock" that all elite springers have


Screen Shot 2018-01-23 at 12.15.29 PM.png

Lipo Vulcan

$
0
0
I just got a Vulcan. Im thinking of converting it to use a lipo battery from my rc collection. I have both 2s and 3s batteries. Has anyone converted a stock Vulcan to use a lipo? What was needed to do the conversion? Im thinking of modding the stock battery tray to hold the battery and soldering a connector to the tabs for the plug. Also want to make the battery door magnetic to allow easy acces to the battery.

Hyperfire electrical wiring failure! Need help

$
0
0
IMAG0310.jpg
https://www.youtube.com/watch?v=yRspanhxKEM&t=596s
 
After spending too much time trying to finally wire up my hyperfire, I've decided to come here once again, and try to find an answer for my problems. I followed Make test battles video guide for wiring up a rapidstrike for this, and with a little guesstimation I've gotten this far. Right now when the flywheels are revved they are spinning in the right direction, and when the conveyor is working it's feeding in the right direction, wired as it is, the conveyor won't work unless the flywheels are revved. Thats how it's supposed to be, but when i pull the tigger for the conveyor, it shuts off the flywheel motors. Following MTB's video exactly made it so that the motors were spinning backwards, and the conveyor was going backwards.
 
These are the wiring steps i used to get this far.
 
1. [font=arial]Positive from the battery to the NO on the rev trigger[/font]
[font=arial]2. [/font][font=arial]com on rev trigger to back flywheels[/font]
[font=arial]3. [/font][font=arial]com on rev trigger to NO on conveyor trigger[/font]
[font=arial]4. [/font]com on conveyor trigger to top conveyor motor tab
5. Top conveyor motor tab to top row on flywheels
6. [font=arial]Bottom conveyor motor tab to NC on conveyor trigger[/font]
[font=arial]7. [/font][font=arial]NC on conveyor trigger to negative on battery.[/font]
 
I'm still really new with modding, and this is the first electrical project that isn't a stryfe. I really appreciate all the help I've gotten here so far, and I can't wait to be able to show everyone everything that I've accomplished.
Viewing all 627 articles
Browse latest View live