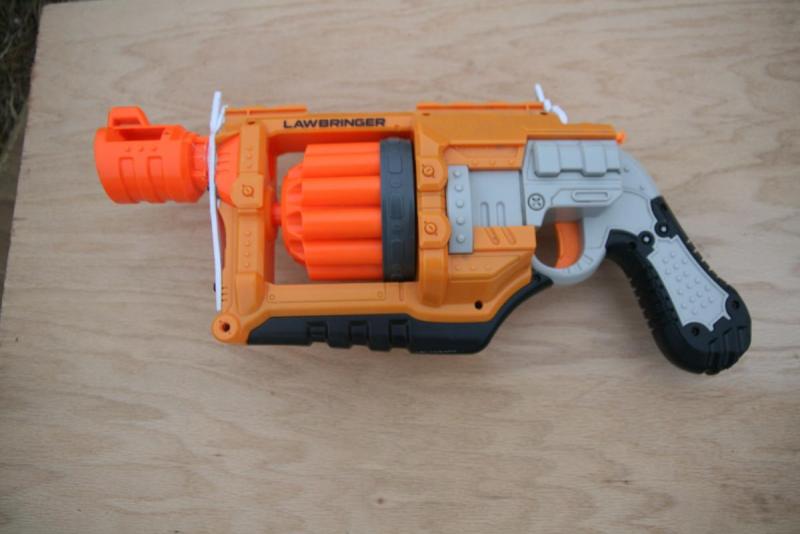
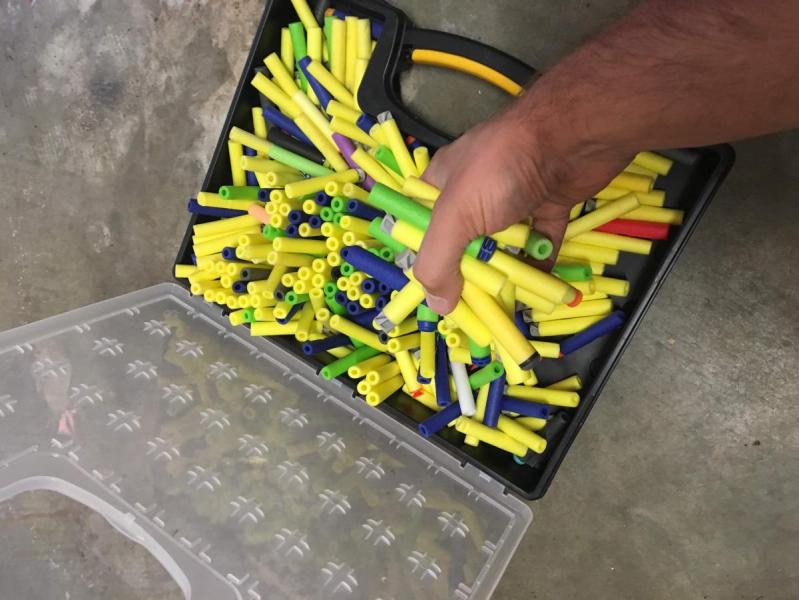
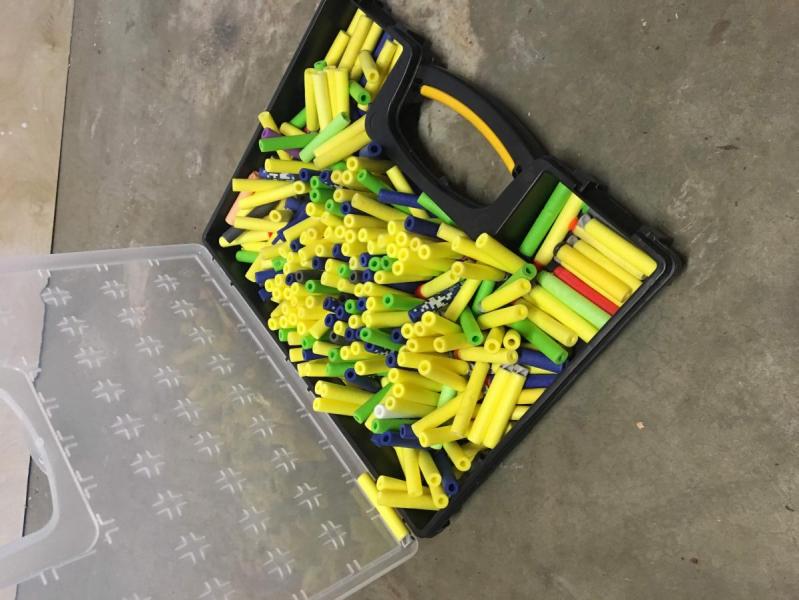
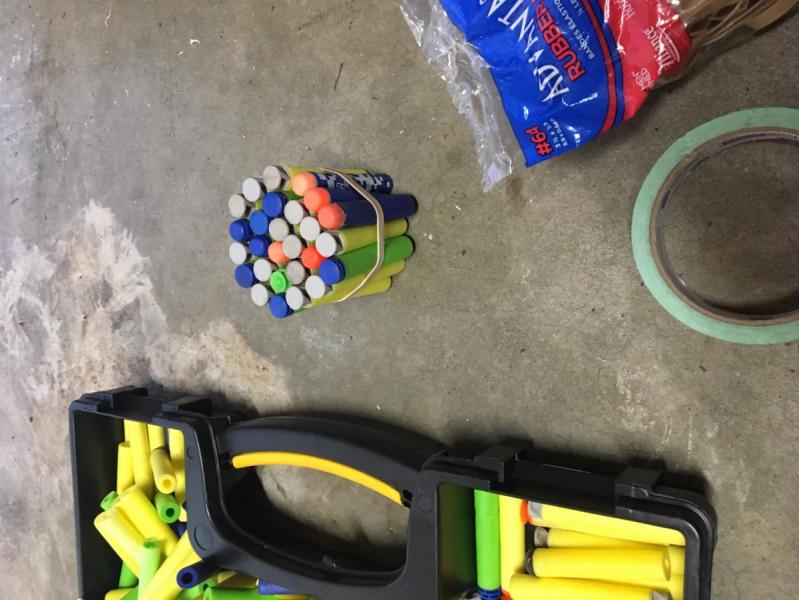
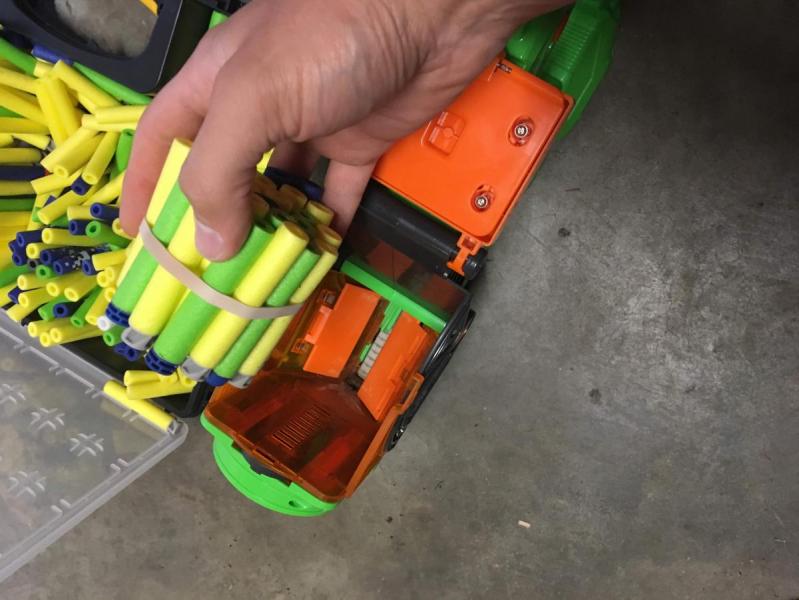
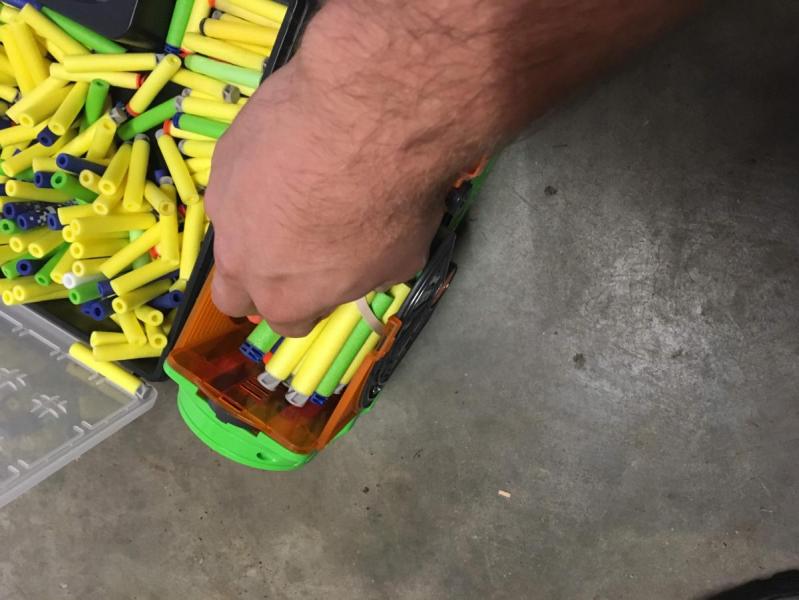
Upgraded Desolator with Fang revamped motors and Worker (white) wheels in the stock cage. 50% of stock nerf darts are whirly birds. I have one Accustrike dart and that flies ok. Also seems to be chewing up the darts. Fyi, I added the same Worker wheels on two other blasters running Meshel 2.0 motors, stock cage and no no whirly birds and no dart damage. Looking for feedback from the experts. Thanks!
↧
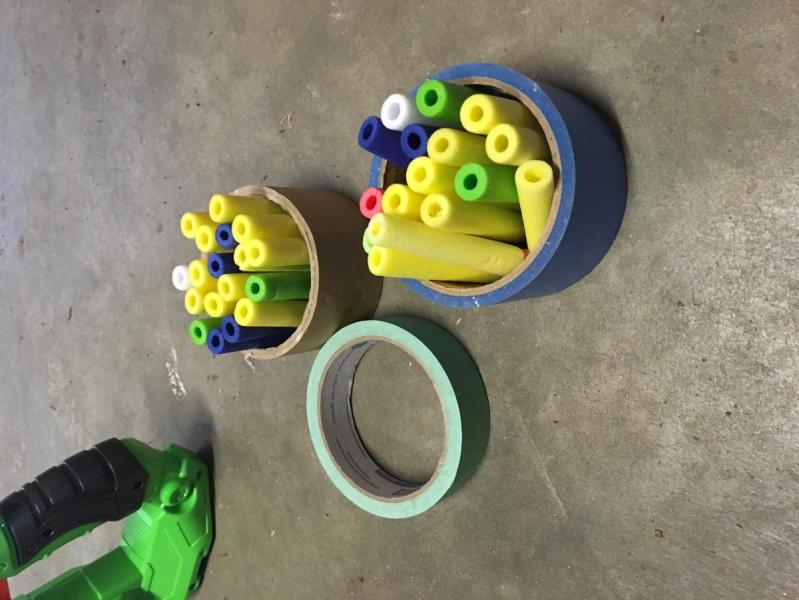
Getting whirly bird darts after mod
↧
Kronos Mod [k25] Vs [k26]
So I picked up a Kronos a few days ago and I can definitely see why it became so popular. It's accuracy and range are unmatched as far as pistols go (in stock form). Anyways, my friend ordered a [k25] spring, and he had some extra that he said he would give to me. I've seen a Lot of people use [k26] springs and only a few use [k25]. Other than FPS difference, are there any other differences between the two? Also I read that the [k25] Kronos is more accurate than a [k26] Kronos. Is this true? Thanks.
↧
↧
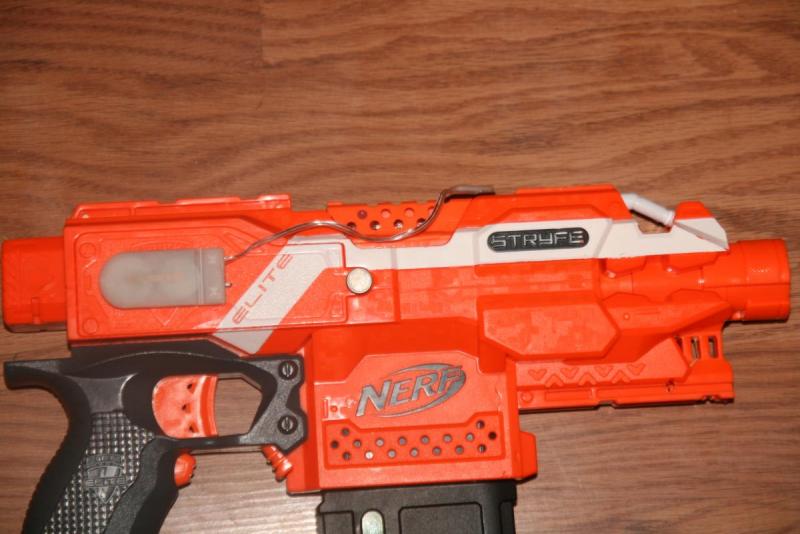
Re wired Stryfe IMR Battery
So I just rewired my Stryfe with 18 Gauge wire. The internals are stock motors, stock rev switch and the battery tray is stock. Anyways, I'm going to put IMRs into it. I heard that with a re wire, it can run off of 4 IMRs. Would it be safer for the motors if I only use 3? What is your opinion on this? Thanks
↧
Air Zone turbo fire modification notes
Thought I'd save my findings online in case someone finds this relevant:
Using some of the methods described here:
Pics:
i.e.
Added 1 extra spring
Removed dart pegs
Removed plastic shroud
Re-lubricated using silicon grease
Added a bit of epoxy for extra reinforcement
Spring:
Used some 2 random springs, I'm unsure of their specification, unfortunately - they appear to have similar size/stiffness to stock, which is in turn similar to stock Australian elite springs. It likely makes little difference though, since the plunger tubes are small/resistance is low/there's some air leakage between the cylinder/plunger.
Rotation mech:
Even after removing the shroud, as you can see in the video, there seems to be some rotation issues with FVJs. They don't actually occur that often during operation, since the pump typically moves slightly faster, but it's worth noting.
Performance test:
Performance data (fps):
62.1, 61.6, 59.8, 56.4, 59.7, 69.5, 67.3
High of 69.5, average of 62.4, SD 4.60 with a sample size of 7 shots. Just under stock American elite performance.
Also I'll try to take better pictures next time I make notes, only just realising the pictures aren't that comprehensive.
↧
"new" worker abs flywheels?
Hello everyone, I'm hoping you all can school me on the newer Worker abs plastic flywheels. I currently use the older white concave vertical toothed Worker flywheels in my stryfe and love them, but am curious if there is a difference between the older white one and newer black abs concave vertical tooth worker flywheels other than color? Also noticed you can get the black abs concave worker wheels with either vertical teeth like the old white ones, or with diagonal teeth. What if any differnce would vertical teeth vs diagonal teeth have?
Are the newer blcak abs wheels as light as the older white abs wheels?
Please school me on these wheels.
Are the newer blcak abs wheels as light as the older white abs wheels?
Please school me on these wheels.
↧
↧
Stock Nerf Hyperfire on Airsoft Battery
Now I'm sure by reading the title you are already cringing. Anyways I essentially stuck an Airsoft Battery into my Hyperfire. Although I have to say, it fits very well in the battery tray with the battery deviders removed. Im able to get 8-9 darts a second with this. What is your opinion on this? Also what do you think will be the first part that will get fried?
↧
Do 180's Actually Increase FPS?
I'm thinking about swapping my fangs revamped Motors for a set of 180 neo hellcats. I know the hellcats have more torque then the fangs, but the fangs spin faster at 37,000 versus hellcats at 36,600. So, would the fangs shoot higher FPS numbers or does the torque of the hellcats actually transfer to hire FPS numbers??
I may go after the hellcats because of the spin up time alone, but I'm still unsure which will actually shoot harder. (depending on the flywheels of course).
Thanks!
I may go after the hellcats because of the spin up time alone, but I'm still unsure which will actually shoot harder. (depending on the flywheels of course).
Thanks!
↧
Safe way to compressor mod a Titan?
I know someone somewhere has probably made a mod guide for this, but I couldn't find one.
Titans are awesome. Pumping them manually sucks. Big tanks=big boom, but that can result in shrapnel if not done correctly.
So I was wondering if anyone did a mod guide on how to PROPERLY compressor mod a Titan?
↧
Flywheel Weight Reduction
Has anyone ever tried drilling holes on the face of a set of flywheels for weight reduction?
If you measure carefully, space the holes out correctly, and drill 4 or 5 half inch holes, you'd have a significantly lighter set of wheels!
Only down side I see is them becoming unbalanced and very noisy. What do you guys think??
If you measure carefully, space the holes out correctly, and drill 4 or 5 half inch holes, you'd have a significantly lighter set of wheels!
Only down side I see is them becoming unbalanced and very noisy. What do you guys think??
↧
↧
My first stryfe mod part 1
i added led lights strung and hot glue to the inside of the shell. on the first picture you can see i hot glued to the battery door the switch. for part 2 i am adding meishel 2.0s and covering up the white stripes. thanks!
i also can no longer open the jam door, but it's fine i can unjam it through the mag well
↧
lowest Amp 130 motors?
Hey everyone, I'm hoping you all can help me find the lowest amp 130 motors, aside from stock motors. I am looking for motors with the 2 mounting holes to attach to an aftermarket cage, but trying to find some with low amp/stall current for a small battery for an entry level/loaner blaster. Seems like mtb rhino as far as I can tell.
↧
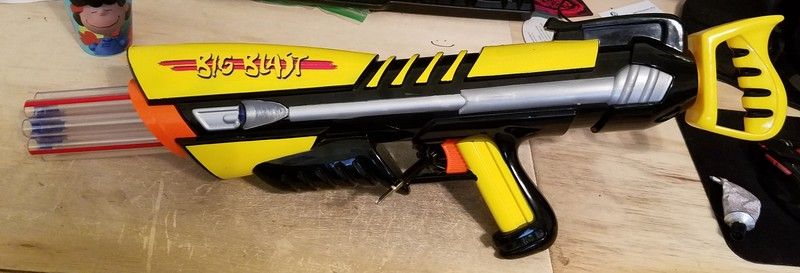
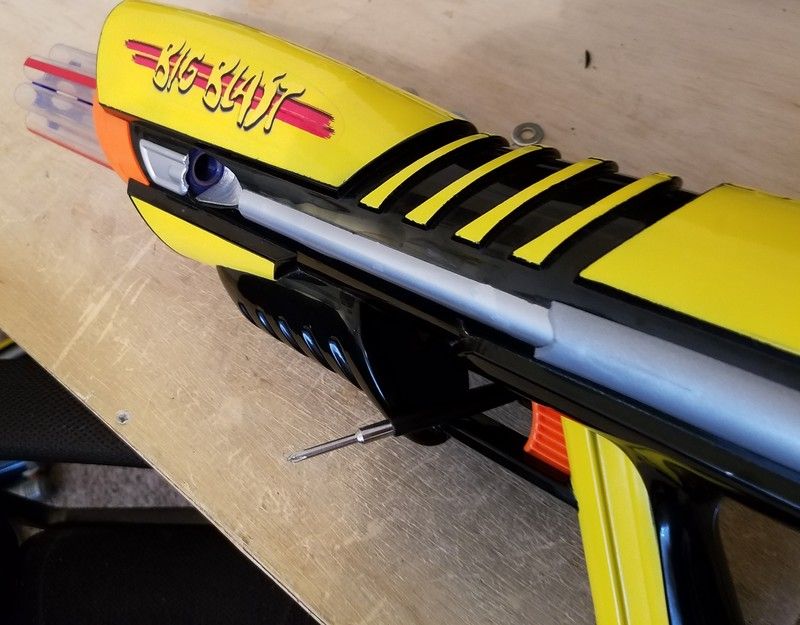
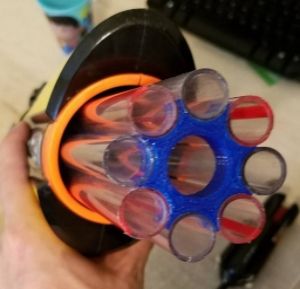
Buzz Bee Big Blast 3-D Printed 8-Shot Turret
Background
So in my incessant thrifting I came across a pair of Big Blasts and immediately had a great idea for one: I wanted to cleanly integrate a nice turret capable of rear loading.
One problem is that I have limited access to a machine shop, so I opted to do most of the build using 3-D printed parts.
The end result is a Big Blast reminiscent of Ryan McNumbers rear loading AT3ks
Materials
- 3-D Printer
- 3" 1/4-20 or 1/4-28 bolt
- 1/4" washer
- Nylon insert locknut for the 3" bolt
- Small strong spring-- I got mine in a spring assortment bag years ago
- 8 barrels of your choosing 5/8" OD I used some PETG 5/8" OD 1/2" ID CPVC works too, but I would bore it out so it's not so tight
- Marble-- Mine was from slingshot ammo and the OD is 0.540" so try to get one close to that
- Spring 9657K286-- I believe that is the part number
- 1/16" thick neoprene washer-- most hardware stores carry these
- Super Glue
- Amazing Goop
GrabCAD Files
Here is the link to the GrabCAD folder. There is a SolidWorks model of the whole turret, and .stl and .step files for the 3-D printed parts.
When you are printing these I found that the holes for the barrels in the base and spacer were not that accurate diameter-wise.
My solution was to print them close and use a 5/8" reamer to do the final sizing.
I would do a test print of the the spacer or part of the base, and then adjust the hole sizes as needed.
https://grabcad.com/library/buzz-bee-big-blast-8-shot-turret-1
Write up
Building this is pretty self explanatory, and the pictures do a pretty good walk through, so I'll let them do most of the explanation.
- I used 7" barrels, but use whatever you want
- The turret will fit snugly in the shell, so be careful not to remove too much material.
- I super glued the barrels in place, but feel free to use whatever glue you want.
- Print the turret base so the junction to the BBBB tank is down then you should be able to avoid any supports in the internal air passage
- You can also do any other sort of mods you want i.e. pump relocation, trigger replacement...
For the turret base you will see better performance if you do some after treatment of the print such as a vapor bath. This will seal the layers together well, and prevent leakage from the internal air passage.
I used PLA which is not easy dissolve but I did a vapor treat using tetrahydrofuran. This stuff is nasty, if you aren't trained to work with it DO NOT!!!!
Another safer option is just to paint the internal passages with a durable enamel paint, like nail polish or modeling paints.
For ABS prints acetone is readily available (Nail polish remover) and not as dangerous, but still use caution. You could even just apply it to the internal walls of the air passage using a cotton-swab.
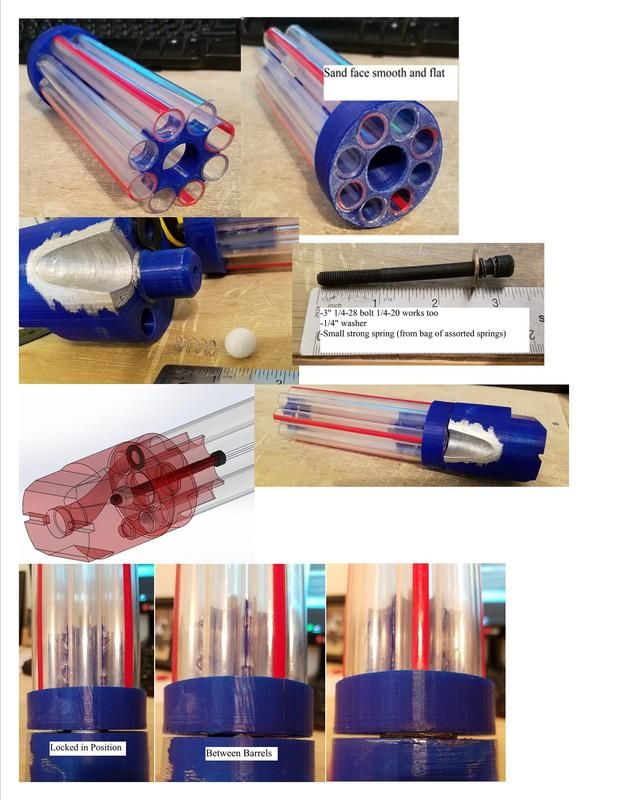
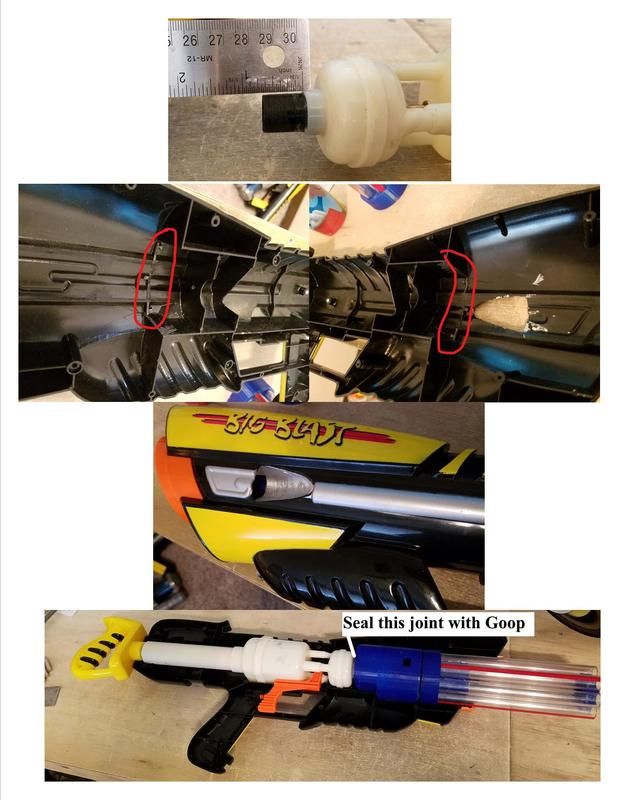
Finished Product
Questions, comments, concerns?
↧
Nerf Hera Microswitch
I am wanting to Lipo mod my Hera, but have seen people talk about the limited space in the handle to put an upgraded microswitch. I dont really want to mosfet the Hera either. Can't I just put in an upgraded microswitch and leave the end with the padel thing exposed and use that as the rev trigger? What do you think?
↧
↧
10kg firestrike spring?
Hey everyone, hoping someone here can point me in the direction of a ~10kg spring for a Firestrike.
I currently have an OMW 7kg firestrike/strongarm spring and brass barrel in my firestrike and trying to find a slightly heavier spring but not finding any heavier firestrike/strongarm springs. I'm not a fan of cut to length darts due to the last coil not being flat, and would muuuuch rather support a nerf parts company, so I would prefer a firestrike/strongarm specific spring if possible.
If any of you know of any firestrike or strongarm springs that are stronger than my current omw 7kg spring plleeeaaasssee let me know.
Thank you!
↧
Best aluminum longshot boltsled and spring combo?
I am planning on getting a brass breach from DartKrafts and need advice choosing the right boltsled and spring combo to go with it; I already purchased the Gavin Fuzzy pump grip so this should complete my build, and I checked the archives but there are new boltsled sand turf springs is now an American company from what I can tell so Im not sure which route to go.
↧
Minimized Lawgiver
so my friend and i worked on this for about four hours. we cut oft the stock and barrel but kept the inner tube and flashhider. we used a dollar tree cutting board to cover up the hole in the front and we cut a hole to fit the tube. ps: my friend did about 85% of it. here are the pics of the finished products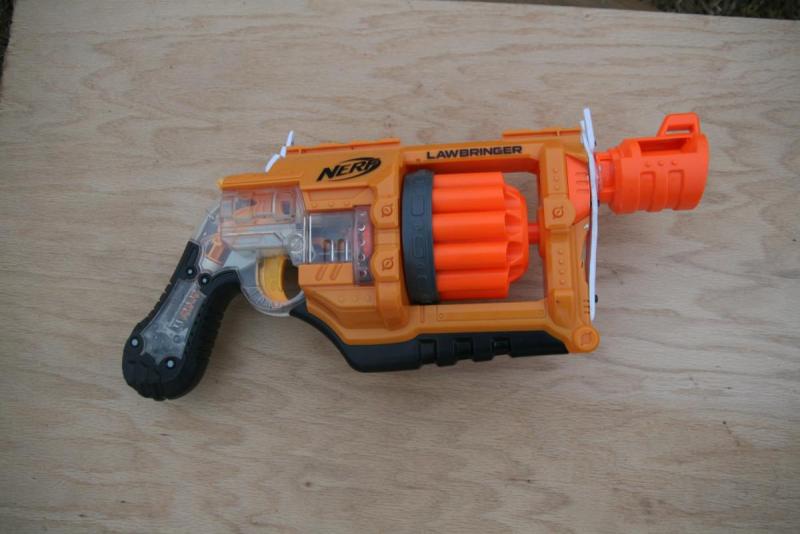
Attached Thumbnails
↧
Stryfe Trigger Spring?
Does anyone know how long & how wide a spring will work for the stryfes trigger? If so, where would I find one?
Thanks
Thanks
↧
↧
COMMANDFIRE!
For those of you who missed what is, IMO, possibly the best stock blaster ever released, the Adventure Force Commandfire is a full-auto flywheel blaster with 40-round a hopper. That's right, you just dump handfuls of darts into the top and fire away; no more messing with mags! Sort of, I'll get to that. Also as a primer, I'd recommend fixing the hopper so it works more reliably with all darts, checking out the internals if you're into that kind of thing, and removing the front parts that are totally just fluff.
So back to no mags: I'm here to change that right back. In a way. Sort of.
You see, the commandfire's whole premise of "high-cap no mags" is true, but dumping 40 darts into a hopper in any meaningful way while also playing isn't easy. This has led insightful youtube-nerfers to relegate it to a secondary role - keep it on you (it's not overly large) and use it as suppression, a room-broom, or CIWS when needed, switch back to your more traditional primary when not.
Now, I'm going to do this two ways, one is experimental-but-exciting so we'll start with that:
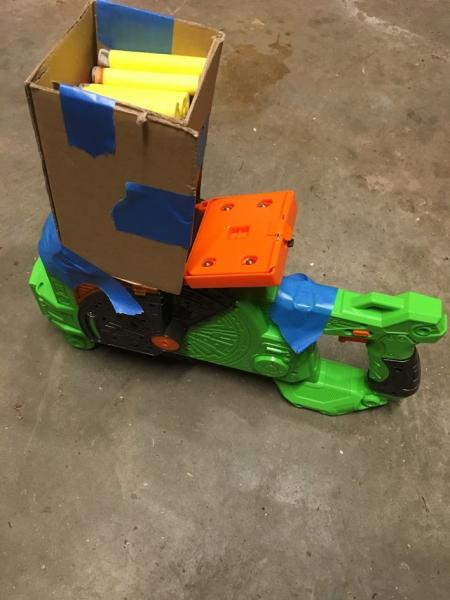
I'll call it the "Crudely tape a box to the top" method. I didn't keep it this way, because I want a primarily mobile blaster, but even this jankenstien was effective:
That's about 97 darts that it fired if I counted right.
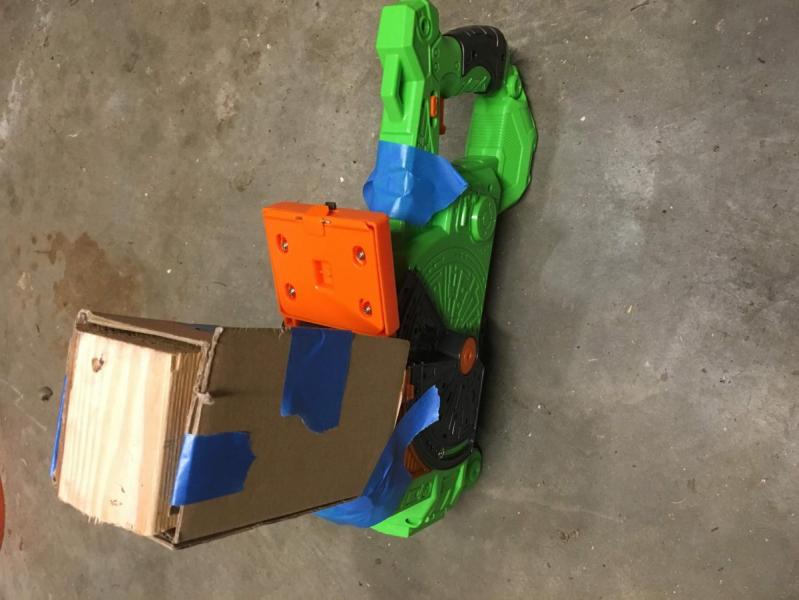
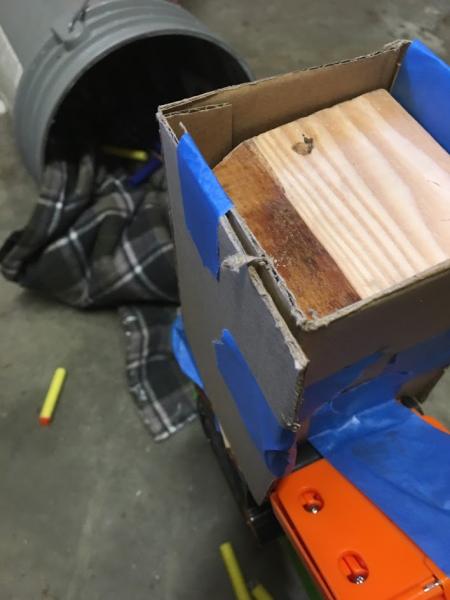
The Commandfire needs a follower to keep the darts oriented the right way, for this, I used a chunk of 2x4 (apologies for sideways; apparently NH's auto-uploader prefers landscape which I did not shoot these in):
I then tested the blaster to see whether my labors had born fruit.
As you've already seen, yeah, it fired about 97 shots - an increase in capacity of about 57.
But it also jammed horribly, a result of my hasty modification and no real measuring to speak of:

So that option is on the table for those who want a super-high capacity and also giant blaster. That doesn't describe me, so I ripped the box off and moved to option 2: Bringing mags back.
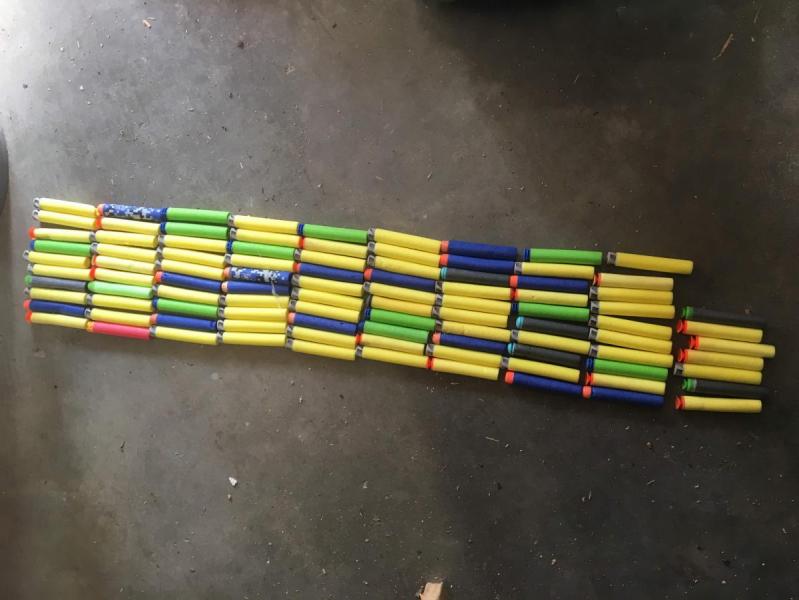
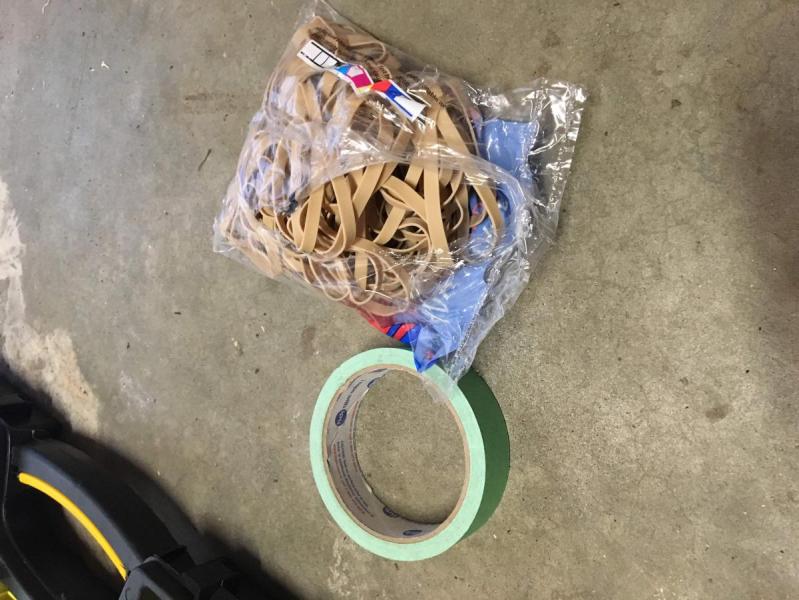
To do this, you'll need a few things: At least one standard tape roll (duct tape, masking tape, packing tape, etc size), a flat surface (table, chair, floor, etc.), a box (smaller for fewer darts, larger for more), #64 rubber bands (got mine at walmart for $1.25 or so; #33, 34, 63, and 80-something would probably also work. #64 is a 1/4" wide size, so it holds a little more securely. Really any size would probably also work), and of course, darts.
After getting the stuff you need, dump a bunch of darts into your box and shake it:
If you didn't notice, what happens is that, once you have a certain critical mass of darts in the box relative to the box size, shaking the box will cause the majority of the darts to align head-down (my box has inside corners, I think those are tripping up the rest of my darts). This makes them easy to grab and dump by the handful into your tape roll:

Keep doing this until full (~25+ darts), then slap a rubber band around the whole thing:

This bundle will now easily slide free of the tape roll, yielding a pack of darts I am hereby naming a "Meaker Mag". You may wish to pack a few extra darts in to make a tighter pack, but most of mine were fine.
To load, simply open your Commandfire and drop the Meaker Mag in:

Then grasp the rubber band and rip it off the back of the darts:
With practice (and maybe both hands) this should result in a freshly loaded Commandfire:

It's also worth noting that bascially any tape roll works, it'll just mean putting the rubber band in a different spot and/or adjusting it later:
The more the merrier.
Now, once you've made yourself a pile of Meaker Mags, you may think to yourself "these fit great in my hand and seem like they'd throw really well". Go ahead, try it. It's not like you're throwing a hard-shelled plastic mag at someone, you're throwing a soft springy Meaker Mag at them. I recommend lobbing it as hard as you can at a solid surface near the unsuspecting target:
It'll get a decent spread, and the higher up/harder it hits the better the spread will be.
In conclusion, not only have I enabled you to completely replace your entire supply of expensive magazines for mere pocket change, and not only in a way that is reasonably safe to just keep laying around loaded, but I have also given you a get-out-of-trouble card by providing a magazine that can, itself (pending your rules allowing thrown darts/rubber band grenades), be used as a formidable anti-crowd foam-thrower.
Testing the load in my unusually rigged load-bearing-gear, I fit 6 such MM's in a dump pouch (~150 darts) and another 4 in the large pocket of my utility pouches (~100 darts). I've also got a large drop-leg pouch that I didn't get out to test, but will probably hold 3-6 more such packs, bringing my total ready-to-load dart capacity up to an easy-to-carry 390 darts (with 40 in the blaster starting out). I'll investigate even easier loading options (backpack, dispenser, bandolier-like setup) in the future, but for now, this'll do. I really only have a little over 1,000 darts anyway, carrying most of that on my person feels sufficient for the kinds of backyard wars I engage in.
↧
flywheels/cage for modulus?
Hi again, Ive had a halfway modified modulus In my basement for 2 and a half years now, and I was looking for a decent cage/ set of flywheels to put in it. Im running it off of a 2s lipo. I dont need anything outstanding, just something thats decent.
↧
Infinus Inspired by TR-27 Gryphon/RS Mod
I've done this same sort of thing to my Infinus. I used an Arduino Micro driving some EM relays and reading pulled-up inputs from all of the switches. I will be switching from the 9 Volt battery for the Arduino and the stock 4D Alkaline tray for the motors to a 3s Lipo, a voltage regulator for the Arduino, pusher, and loading mechanism, and a MOSFET for the flywheels. I will also be upgrading to OOD Krakens for the flywheel motors.
Here's the code I am using: https://create.arduino.cc/editor/limmers2015/68761755-7ba0-498f-ab21-18978a343c42/preview
Your project was the primary inspiration for my attempt! Thank you! This project is amazing!
↧