Glorious Sentinel blaster needs a writeup, because some people will probably need a guide. This guide will cover basic sentinel modifications and possibly link to future guides for brassing and pump action (BuzzBee may be making one in the future due to request and noticing a photo). However, most of these are basic things that everyone should do to their sentinel.
Here's a photo of a VanGripSentinel to inspire you and get interest in the sentinel. However this guide is for the standard lever.
Sentinels are great out of box and another great item from glorious BuzzBee. You can do lots of things to a Sentinel
So what are we doing and what do you need? Well we're going to cover
-Dissasembly
-Internals guide
-Lock guide
-Spring upgrade
-Air Restrictor removal (AR)
-Reinforcement (DO THIS ONE)
-Comfort
-Reassembly
EDIT (LANGLEY PLEASE HELP MAKE IT GO DOWN AUTOMATICALLY)
DISSASEMBLY
To start off. Dissasembling your sentinel may be harder than it looks.
There's some parts you gotta take off.
What You'll need
-A phillips head screw driver (that fits in the holes)
-A flat head screw driver
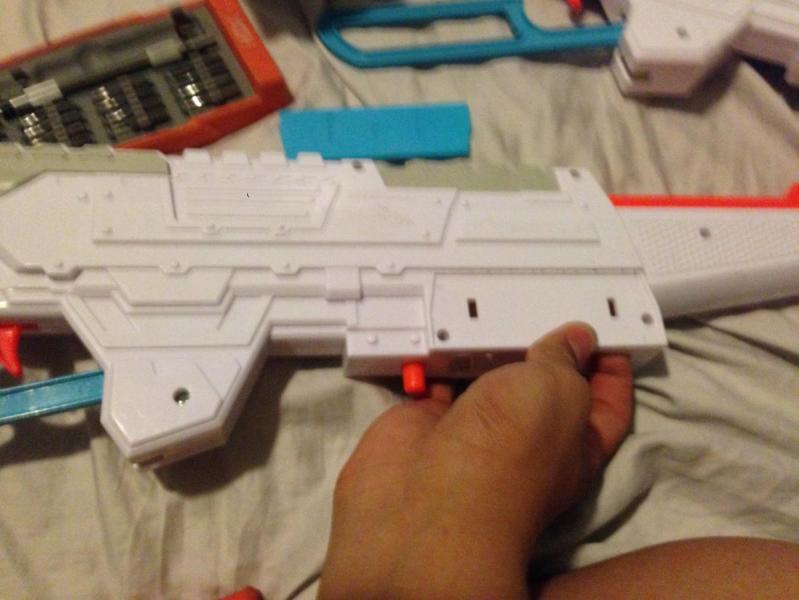
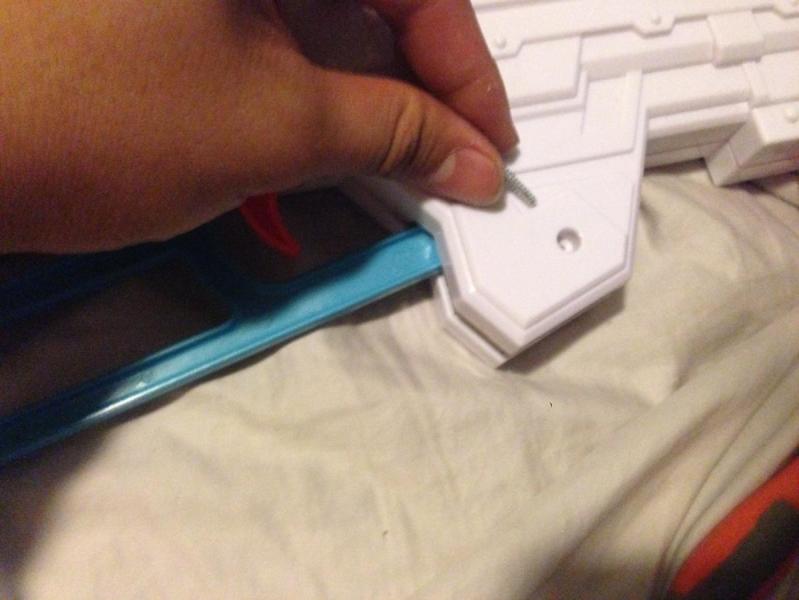
So start by dissasmembling your screws. You can take out all the obvious ones first.
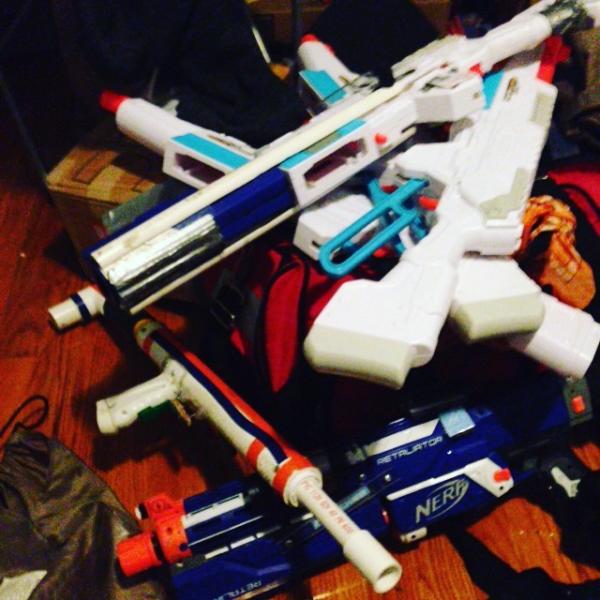
(don't mind the obvious abundance of sentinels, there were actually 5 sentinels that helped make this guide)

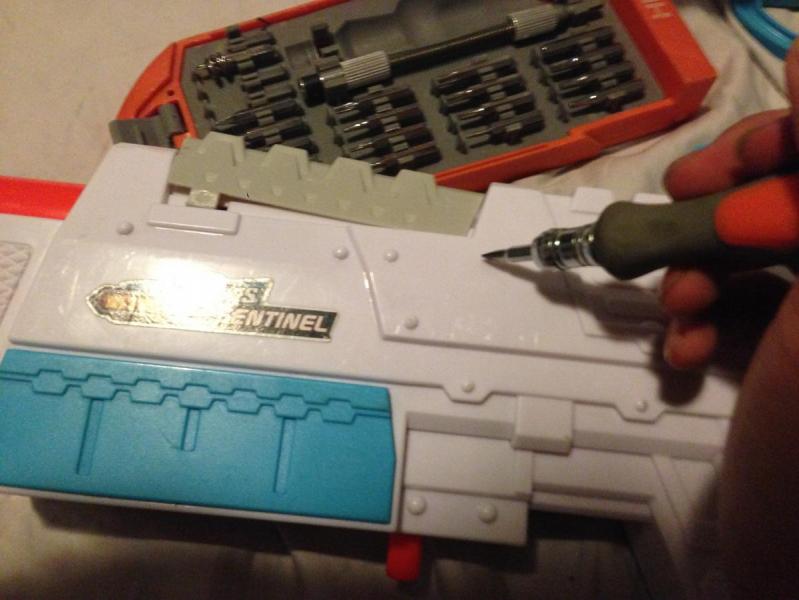
Now removed the blue plate on the screw side. You can push the tab under in the magwell like so

Now use your flat head to take off this top, faux jam door
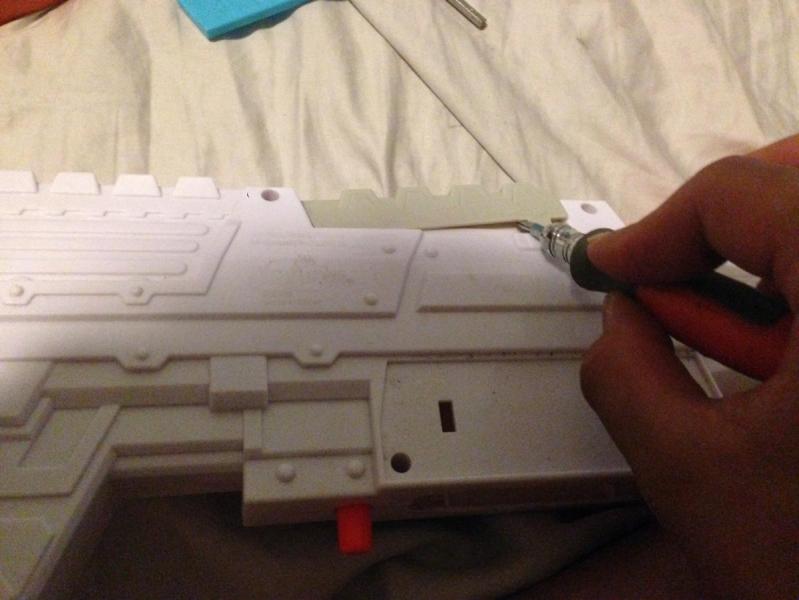
Remove the stock, you can use your nails to pry under it too

You can hold all your screws in the buttplate, held up by the faux jam door. Helps if you like taking out all your screws,
Most of the screws are the same size, but the big one belongs on the lever. Important, and maybe don't replace this screw.
Now butterfly that shit open
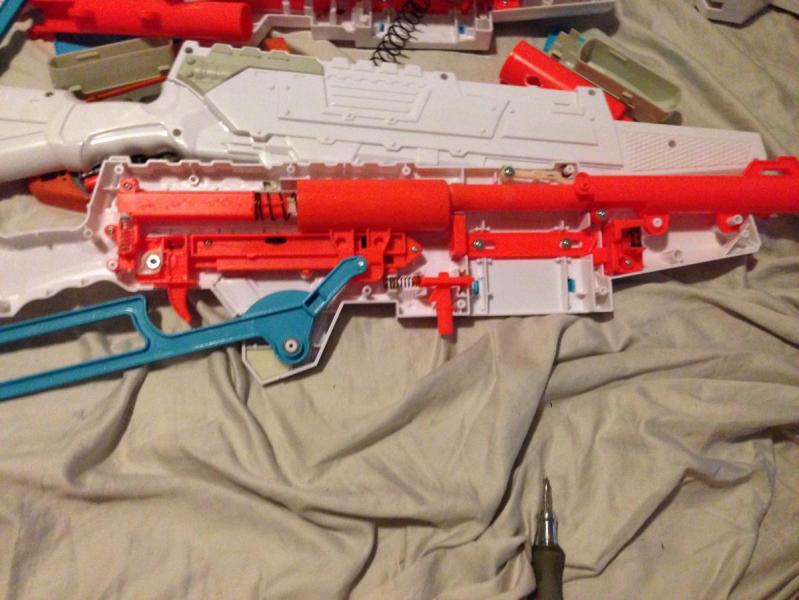
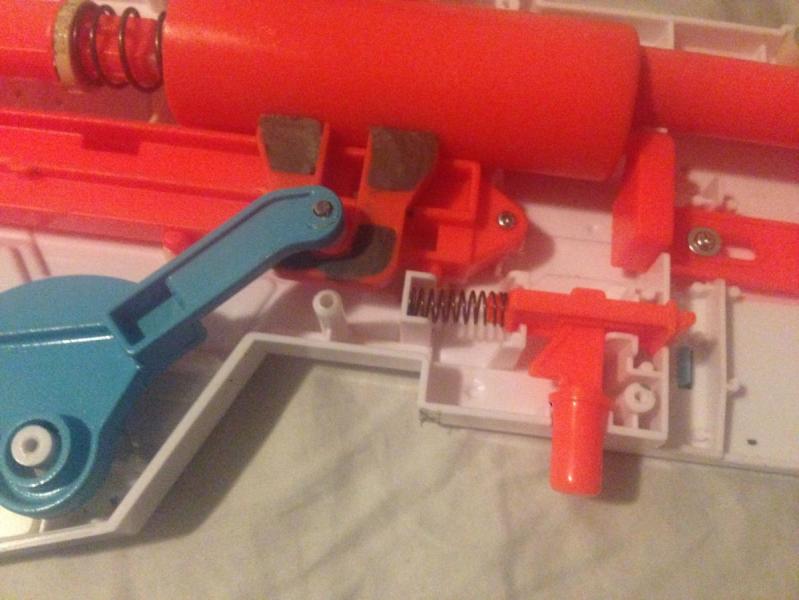
INTERNALS GUIDE
Alright, now what the fuck are we doing?
First off, key things to remember.
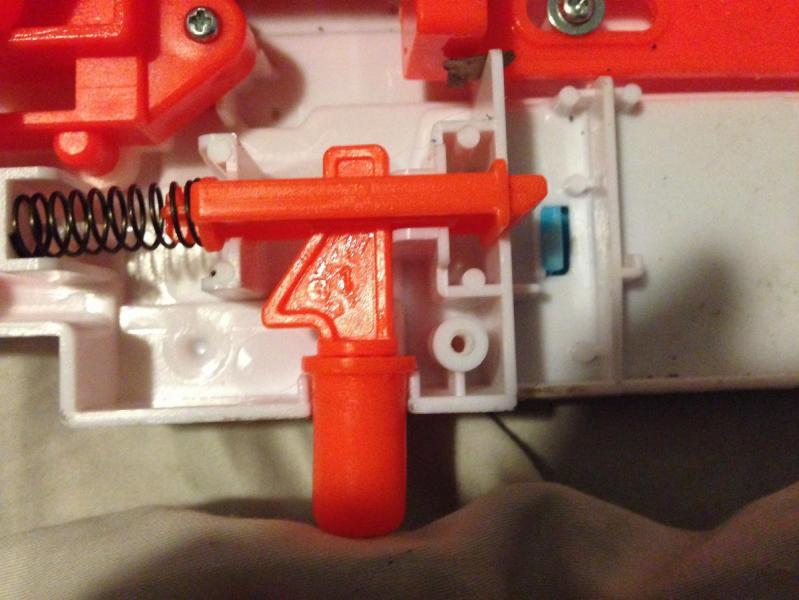
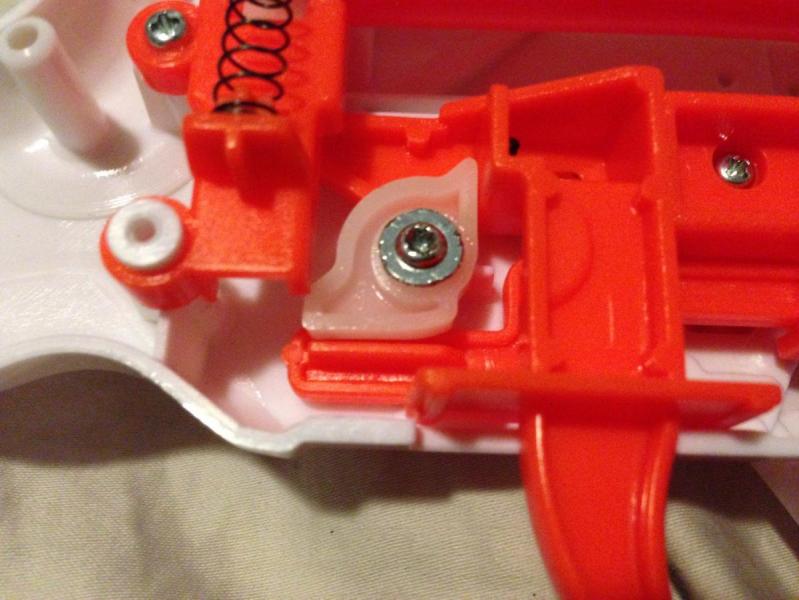
THIS IS THE MAG RELEASE, SIT IT FLAT SIDE FACING UP OR IT WILL NOT HOLD YOUR MAGS IN
A lot of nerfers died getting this information. That being said, take this out and deal with it later.
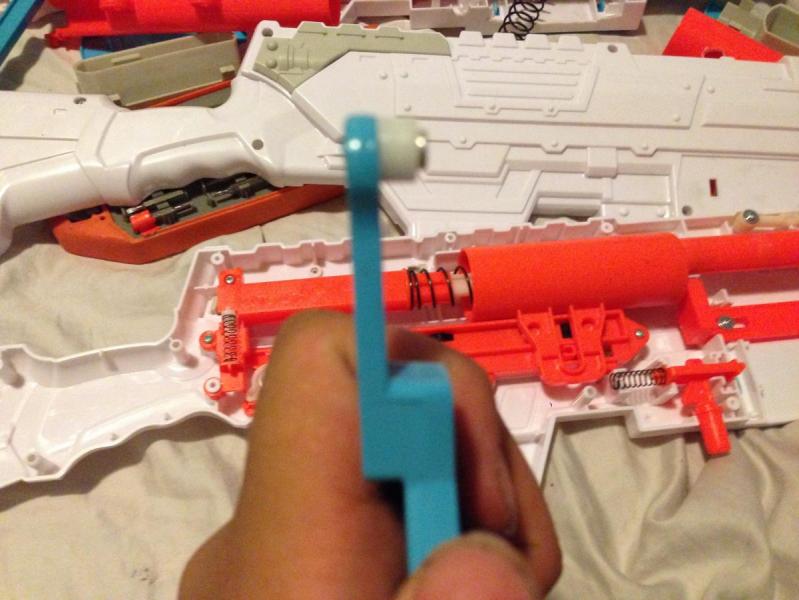
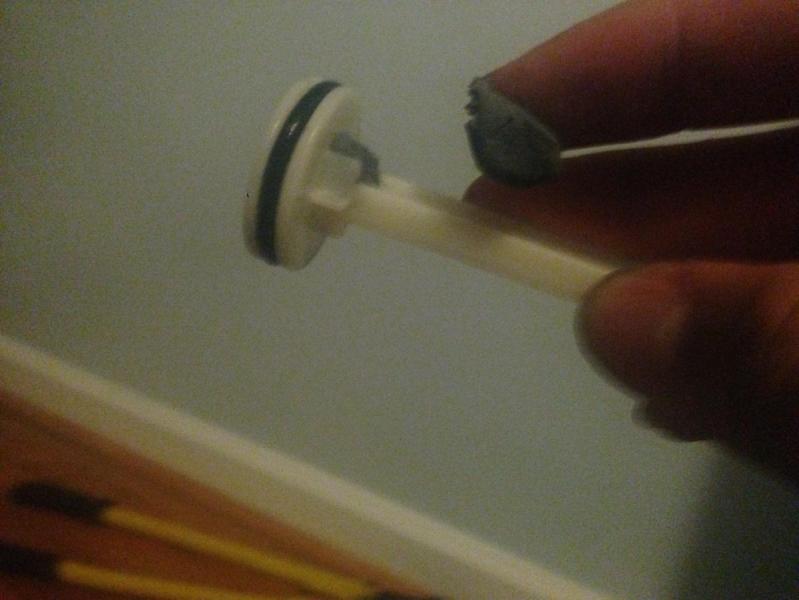
THIS PIECE IS CRITICAL, DON'T LOSE IT. IT'S THE JESUS PIECE. (the grey piece in the lever)
It would suck if you had a white one. Just don't lose this pivot pin, it's important. See the extras below, mark up the spacer so it's easier to see. There's also what to do if you unfortunately lost yours.

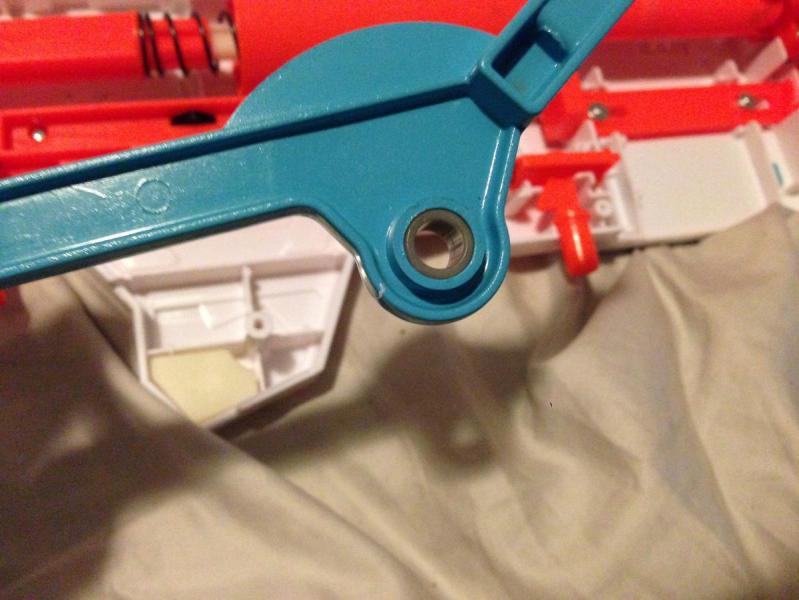
The lever and this roller pin needs to be straight and kept. It shouldn't fall out, but if it does, refer to the notes to decide what to do. Some people put a dab of glue so the pin is kept in, and if it moved out, use a hammer or tek 3 to bash it back into place so it looks like this.
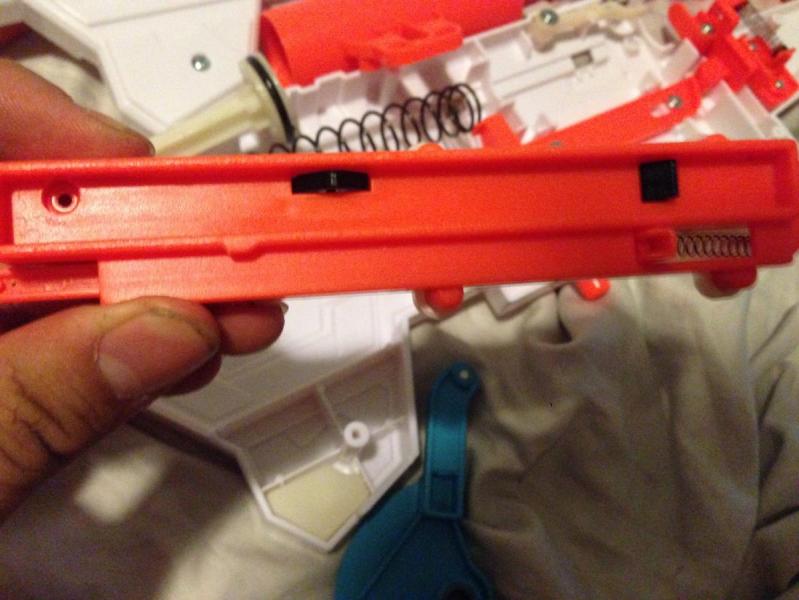
Now what are we looking at again?
This area, don't fuck with it at all. There's no reason to mess with anything here except the faul barrel. (to the right of my finger)
Don't touch that shit up top, it helps guide the breech into place. Just, let everything here be.

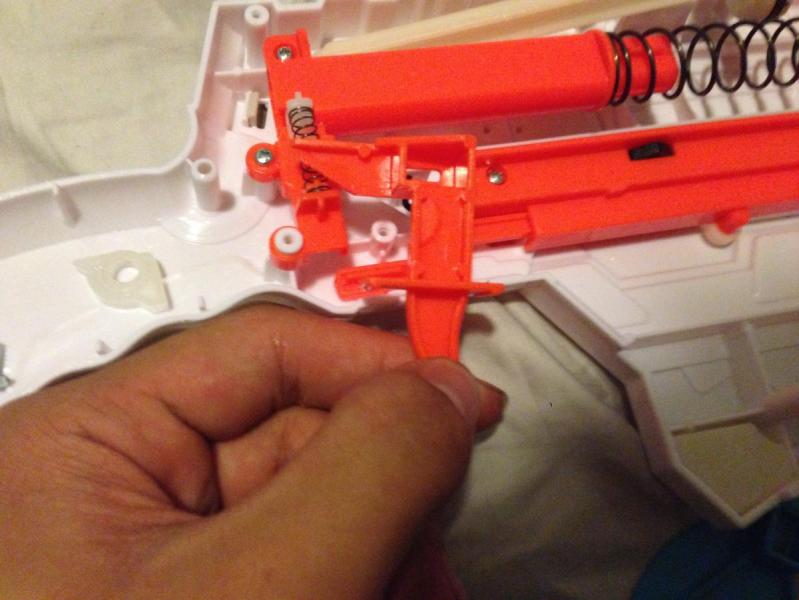
Also, take out your trigger. Just don't bump it, like if you're testing the spring you may dump it and parts go everywhere. The catch is harder to depress. Put that shit in a (your) safeplace because it's very vital (duh). Maybe put it in that screw holder.

LOCK GUIDE
Lets look at some locks.
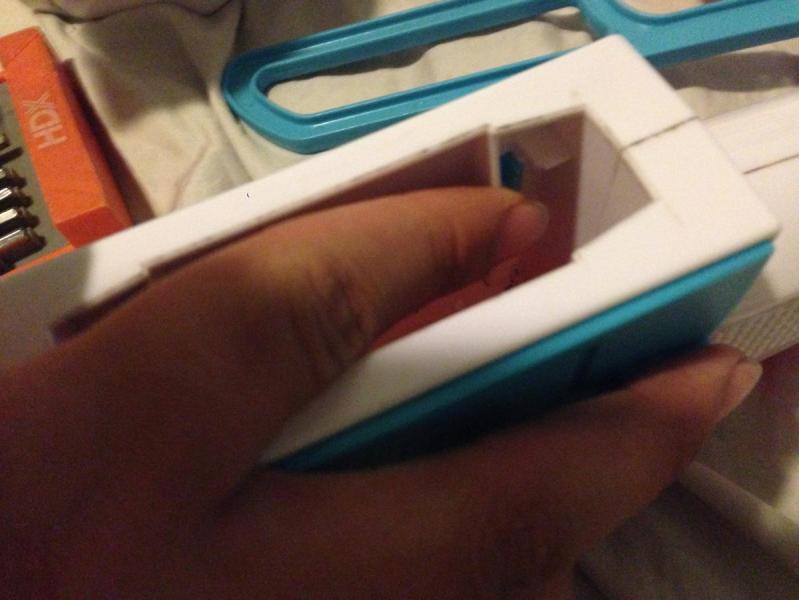
Here's a trigger lock. I threw this out and kept the plate screw, because I like depriming it. this won't be in future photos, but if you want to keep it, keep it in this configuration when reinstalling.
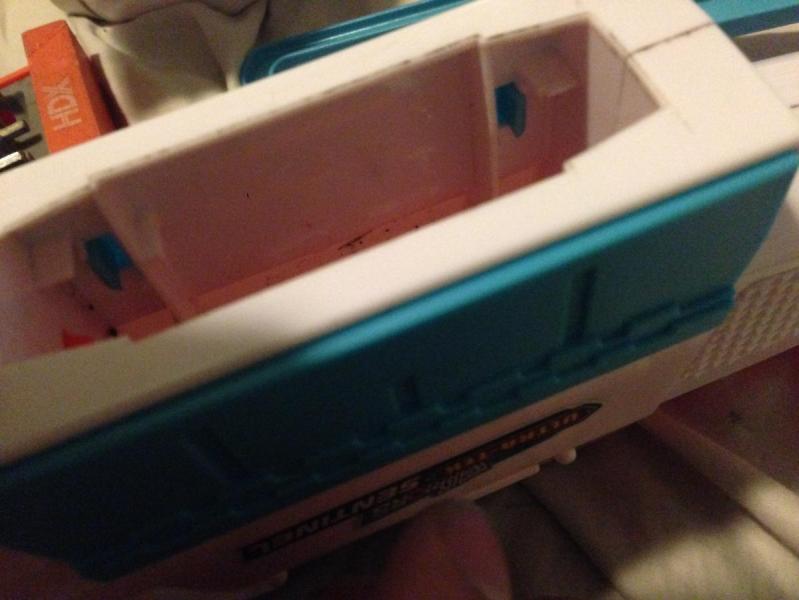
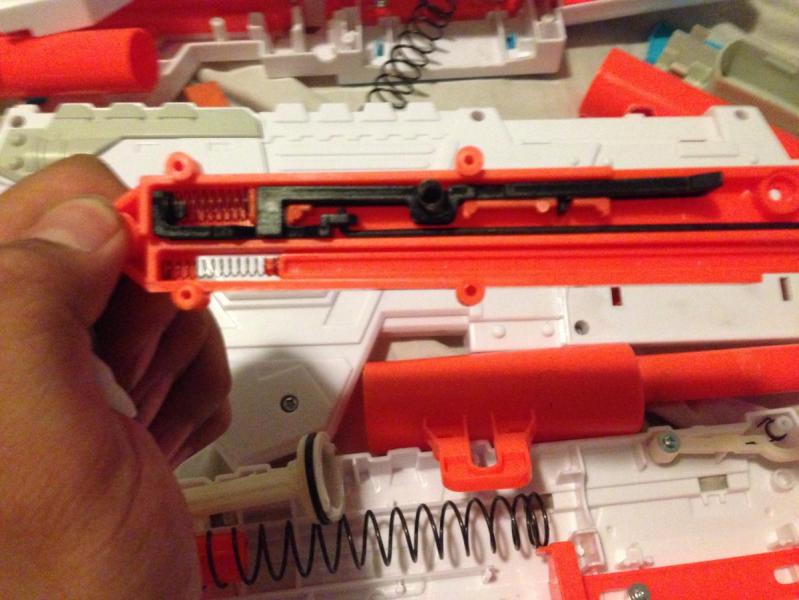
This thing (dissasemble around first) is called the lock box. It helps keep the sentinel primed and won't move back, and has a feature that helps push the plunger tube back after firing. Pretty cool. I wouldn't fuck with it unless you needa deprime. This is reccomended for heavier spring loads
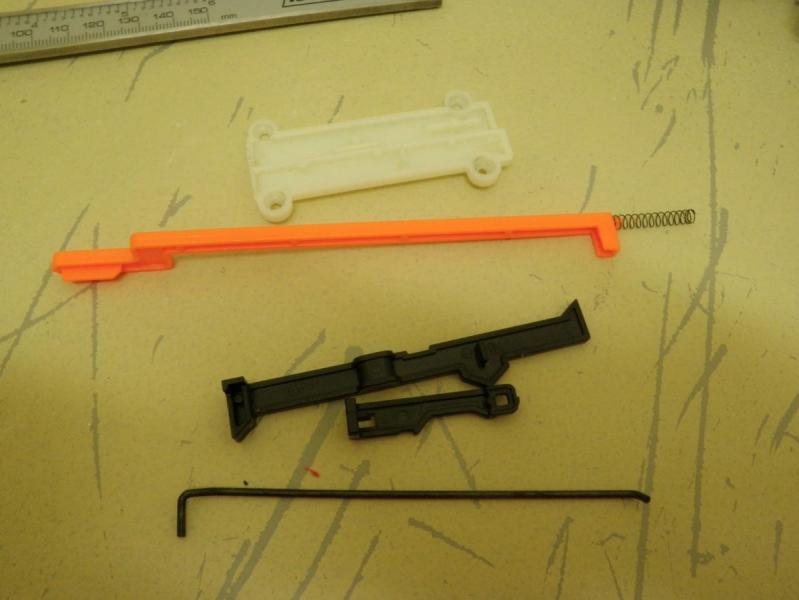
Oh boy, you really wanna gut it. This is what is inside. If you want to reassemble it, put it back in THIS CONFIGURATION
The whole lockbox really just keeps the sentinel primed, and helps guide the PT and lever assembly. The lower orange piece is required for the trigger lock to work. If you take out the trigger lock you may as well remove the lower orange thing.
SPRING REPLACEMENT
Ahh, Glorious sentinel is fine and doesn't need more power. However, some people want more power. If you do this, I reccomend removing some locks so it can deprime, and you don't murder your Plunger rod. I will go over reinforcing it later, but dryfire should always be avoided. (If you're AUS or have an Ultra Tek with a weak spring, I highley reccomend increasing spring power for more performance
What you'll need
-A cpvc ring (1/2 in coupler, and whatever you need to make that ring)
-A replacement spring/additional (duh)
(A k26 13 coils and retaliator like springs are good replacement canidates)
So first, lets get that sentinel open. Take out everything, and put a CPVC spacer on here. This helps you put the secondary spring. Make sure the spring doesn't go past the spacer or it will not catch

Make sure this shit works, cut down some coils, or whatever. I heard you can put a k26 in here, put 13 coils of that in here.

Put the Plunger tube over it, unless you're gonna remove the AR now. Than deprime it and reassemble it later,
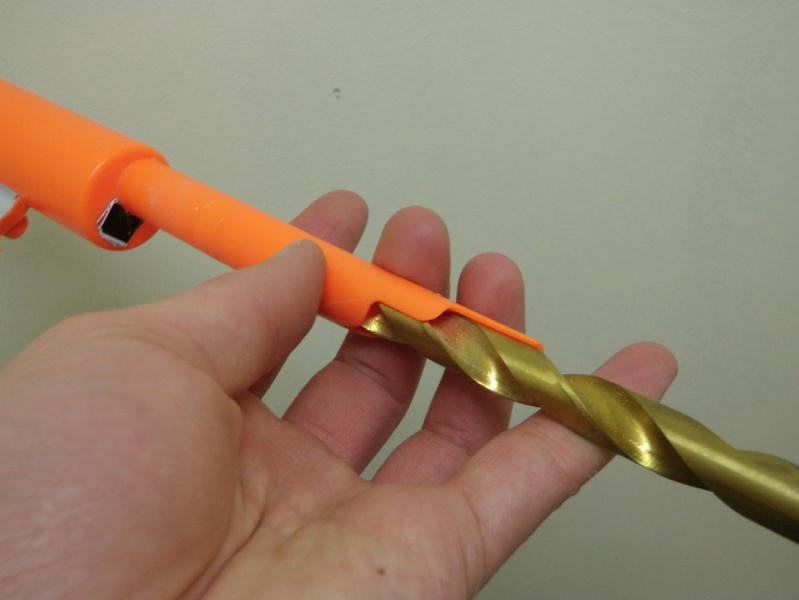
AIR RESTRICTOR REMOVAL
Oh boy, the part that's hard. You can take a traditional, 1-2 ft long screw driver and bash it out with a a hammer. However, a lot of people used a drill.
What you'll need
-A long screw driver
-A hammer
-A 1/2 in drill bit tha's long (like 8 inches? Longer than your dick for sure)
-A drill to drill that bit
OPTIONAL
-A vice (stabilizaion, your hand works just fine though)
Oh boy, so lets look at this. Use the screw driver and tap this pin with the hammer. You don't have to do this, and you can just drill through but idk. You can just try and hammering it out.
Screw driver method (not as clean)

Alright, now take that 1/2 in drill bit, your choice to go in front the front or behind. Not judging, I went from behind, but this photo was outsourced and he went from the front.
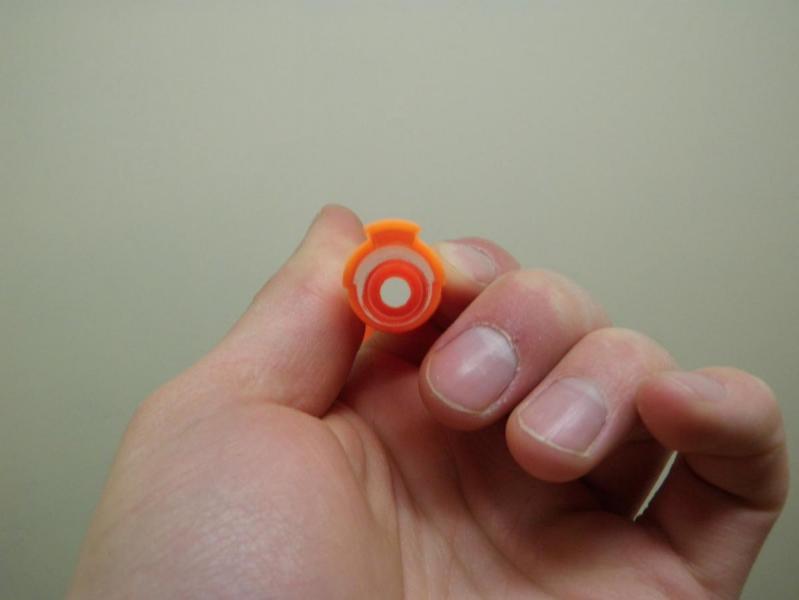
Your plunger tube asembly breech thing should look like this. such flush, very clean, much A E S T H E T I C

Now put that shit back together.
REINFORMENTS
I highly reccomend all of these. I'll divide these into categories, but I reccomend them all because it's just safer. It'll prolong the life of your blaster, esepcially if there was an AR removal and/or spring upgrade. Combine this with the lock removals for deprime, it's extra safe and your sentinel should last quite a while.
Plunger rod Padding
This shit, do this shit, it's fucking vital dude.
What you'll need
-Craft foam (a lot)
-Adhesive of your choice (super glue cuz it's fast, but epoxy, gorilla glue, sperm, as long as it sticks its fine)
-Xacto knife (or some other sharp precision knife)
OPTIONAL
-Hotglue (to fill the gap so you just have one layer of foam, but this adds more weight to plunger rod. That's bad)
Alright, get your Plunger rod. Remove you O ring for this, I didn't but you don't wanna accidentally cut it. Put the plunger tube in the center and trace. Keep repeating and glue in each layer so it's level with the top of the plunger head,
It should be like this
Now repeat the first step, and put a layer over so you cover the plastic than glue it in. Let it cure for the reccomended time. Cut out a bit so the side let air flow in. Or don't, but I think it's helpful

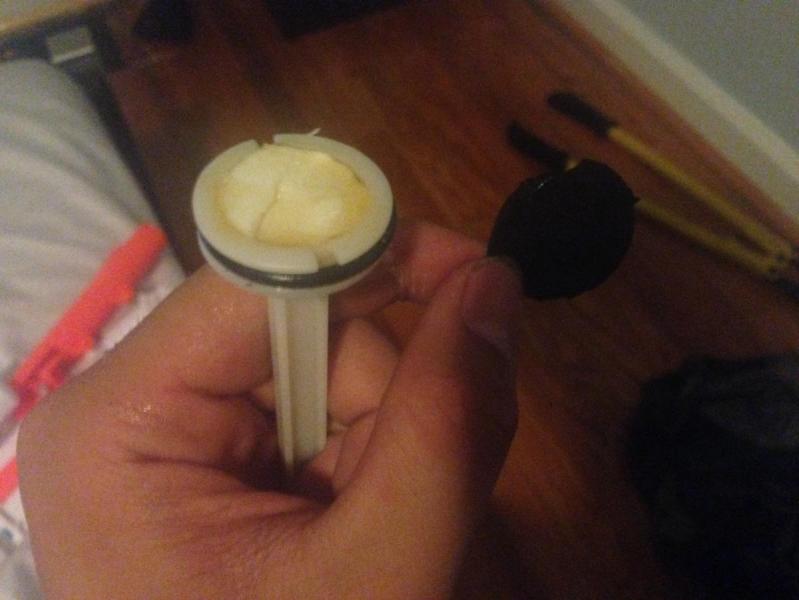
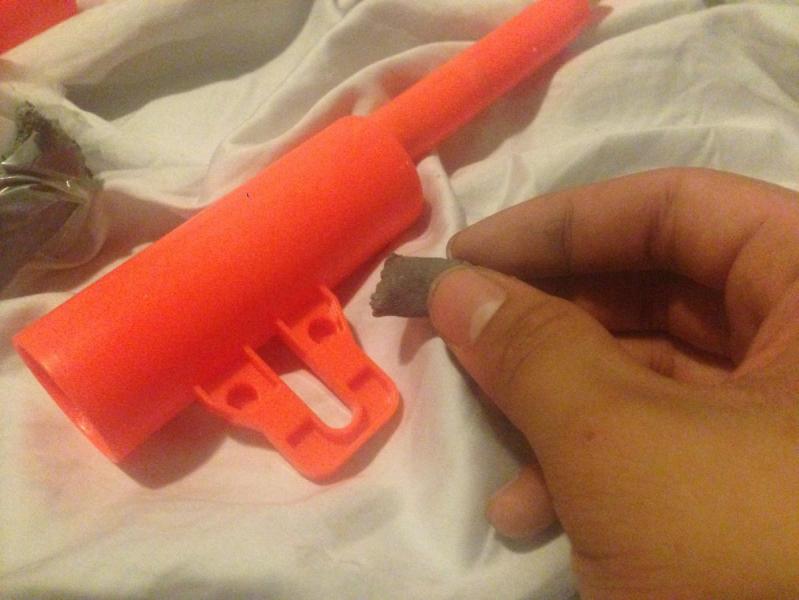
Plunger rod Reinforcement
Kinda useful, I've seen a plunger head broken off from excessive force. This should help a bit. Don't dry fire and shit when unnecessary, I can't stress this enough. Combine this with lock removal AND the padding.
What you'll need
-Epoxy putty
So get that plunger rod. When you recess it back, this area is not doing anything. Fill it with epoxy putty, but nowhere else. DON'T FUCK WITH THE REST OF THE ROD. THERE'S SUPPORTS IN THE ROD COVER (the thing that holds the rod when priming back) BECAUSE IT WILL NOT WORK.
Just get that extended area up, you dont need much E putty. If you have extra, use it for the next reinforcement, which I also highly reccomend
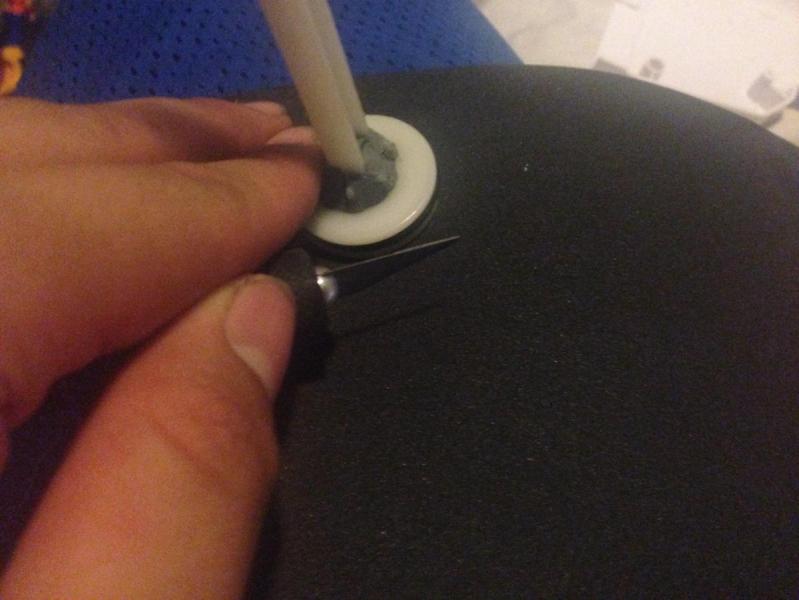
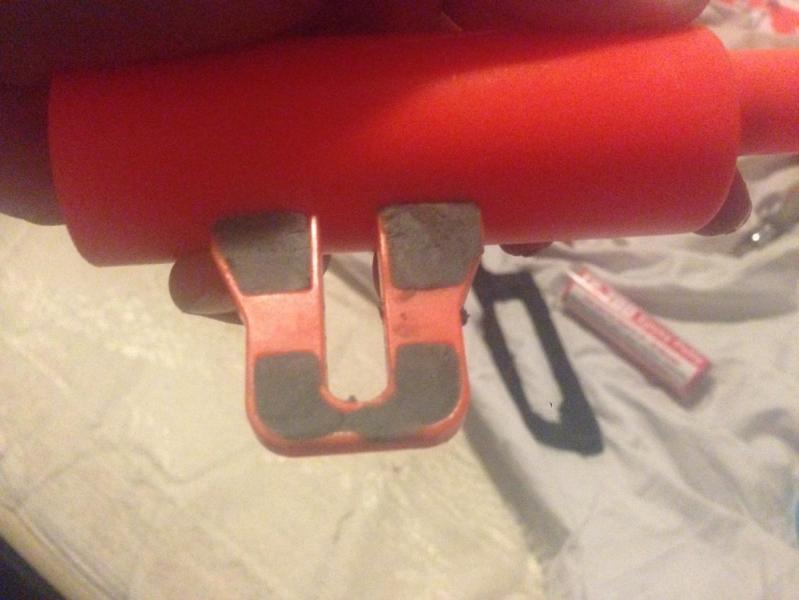
Plunger tube Reinforcment
This shit is very important for higher spring loads, or if you make it pump action. A lot of stress is on the U loop.
What you'll need
-(More) epoxy puttty
I heard you can fill these holes in with regular epoxy, but ehh.
So take some eputty and fill these holes till they're flush.
Front AND back
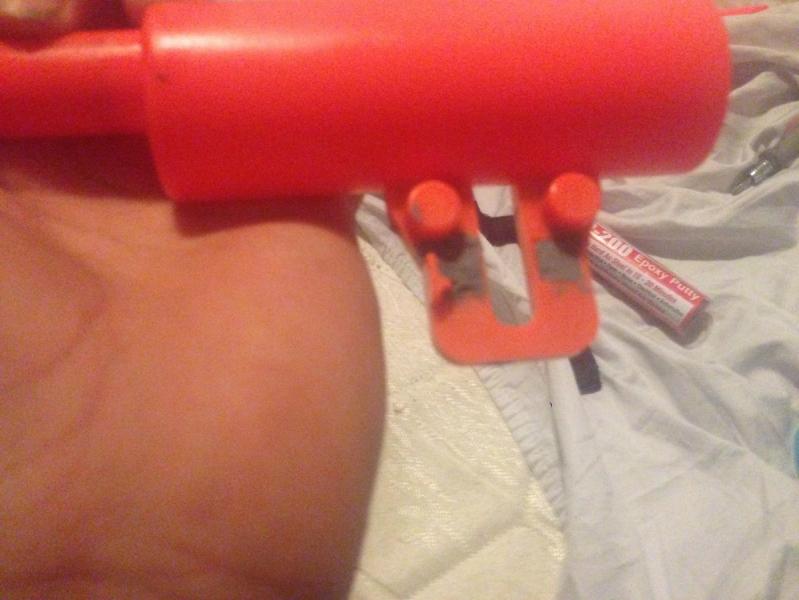
Now test that shit, make sure its flush by using your finger to move any excess epoxy off. Make sure nothing sticks and this works, and it doesn't interfere. I'd recommend just running it over on the guide track/rail a few times for safety, than testing without the spring in and having the lever push the PT back and forth with the shell close. (after the comma isn't required)
COMFORT
Lets admit it, we found out that the metal lever is great but it can hurt after a while. You can either make your sentinel pump action, or wrap the lever. This is a mod most people do out of box, but some people get used to glorious sentinel metal.
(more photos to be added)
What you'll need
-Wrap of your choice (etape, cloth, grip tape, etc)
OPTIONAL
-AV cables
-More tape to hold your wrap in place if it's something like cloth
Alright, fill in the grooves with some old AV cables so the tape doesn't depress into the levers grooves.
Now wrap it around. Kinda hard to explain, just do it. Use tape to hold things in place if you have to.
REASSEMBLY
Aight fam, you made your already amazing sentinel even better. You didn't have to replace the spring or remove AR, and your sentinel is even more war worthy. Best part is, it looks practically stock (unless you wanna do more)
YOU REMEMBER TO PUT THAT MAG RELEASE BACK IN CUZ?
CUZZO THAT SHITS GOTTA BE FLAT SIDE UP TOP REMEMBER?
Your sentinel should look something like this. Make sure everythings here, put the other half on top and screw in a few screws to test and fire it a bit before you close it up entirely. Make sure to fix any kinks or problems
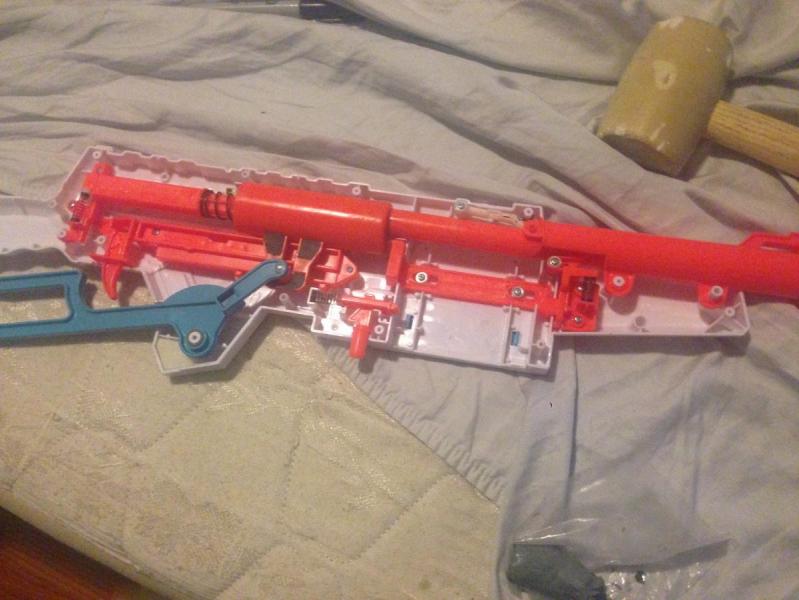
Once you finish screwing everything in, put the faux jam door cover, blue sideplate and buttplate back in. Also, it's reversible, you can have it either way (the buttplate) or run it without a butt plate to give more traction. You can extend the stock if you feel its too short but I'm dead tired from this lol.

END NOTES
First off, fuck you Langley this took a good 5-6 hours, it's 3:43 AM and I'm glad this isn't a school night.
Now you've got a sentinel that's war worthy however. I hope my time invested will help and inspire many of you to mod your BuzzBee Setinel. Nerf is not the only company producing good blasters. BuzzBee right now is like Android, and has very good power. Some of you may dislike the ergonomics, or looks. You can fix those, you're a modder.
Somethings I haven't included are
-Pump Action Guide (My famous one and only VanGripSentinel that has a bolt too!)
-a side rail mount (true rusky style, made of poly carb and designed to hold an expensive camera)
-Cut down Sentinel guide (for extra CQB tacitcs)
-Brassed Sentinel
-Aesthetic improvement (barrel extension, stuff to put on and paint)
and there are probably more. You're limited to your imagination, and you should do more to your Sentinel. It's a great platform, and you can add more onto your sentinel for practicality. These are war tested and work very well. I'll put in a playlist of my sentinel, and other sentinels in action here.
You can make your sentinel great, here are some of my favorites
A wild DX at PSU with his 2 camera setup.

In action at PSU (with bolt)

Join the Sentinel Union yo, optimal BuzzBee Shit here,

BORING SHIT
I have to give thanks. This mod guide had collaberation and help from multiple nerfers.
I'd like to thank BuzzBee for such a glorious blaster, the Sentinel Union for inspiration, and for opening me to Glorious BuzzBee light, Robert Webbe (DX) for letting me use his sentinel for the upgraded spring sentinel for example. Angry Adler (Solar Fusion) for providing AR removal pics because I didn't take pics, and all the people who died for testing in combat of these sentinels. These mods have all been war tested through an HVZ and 3 superstock wars, and some goofing around.